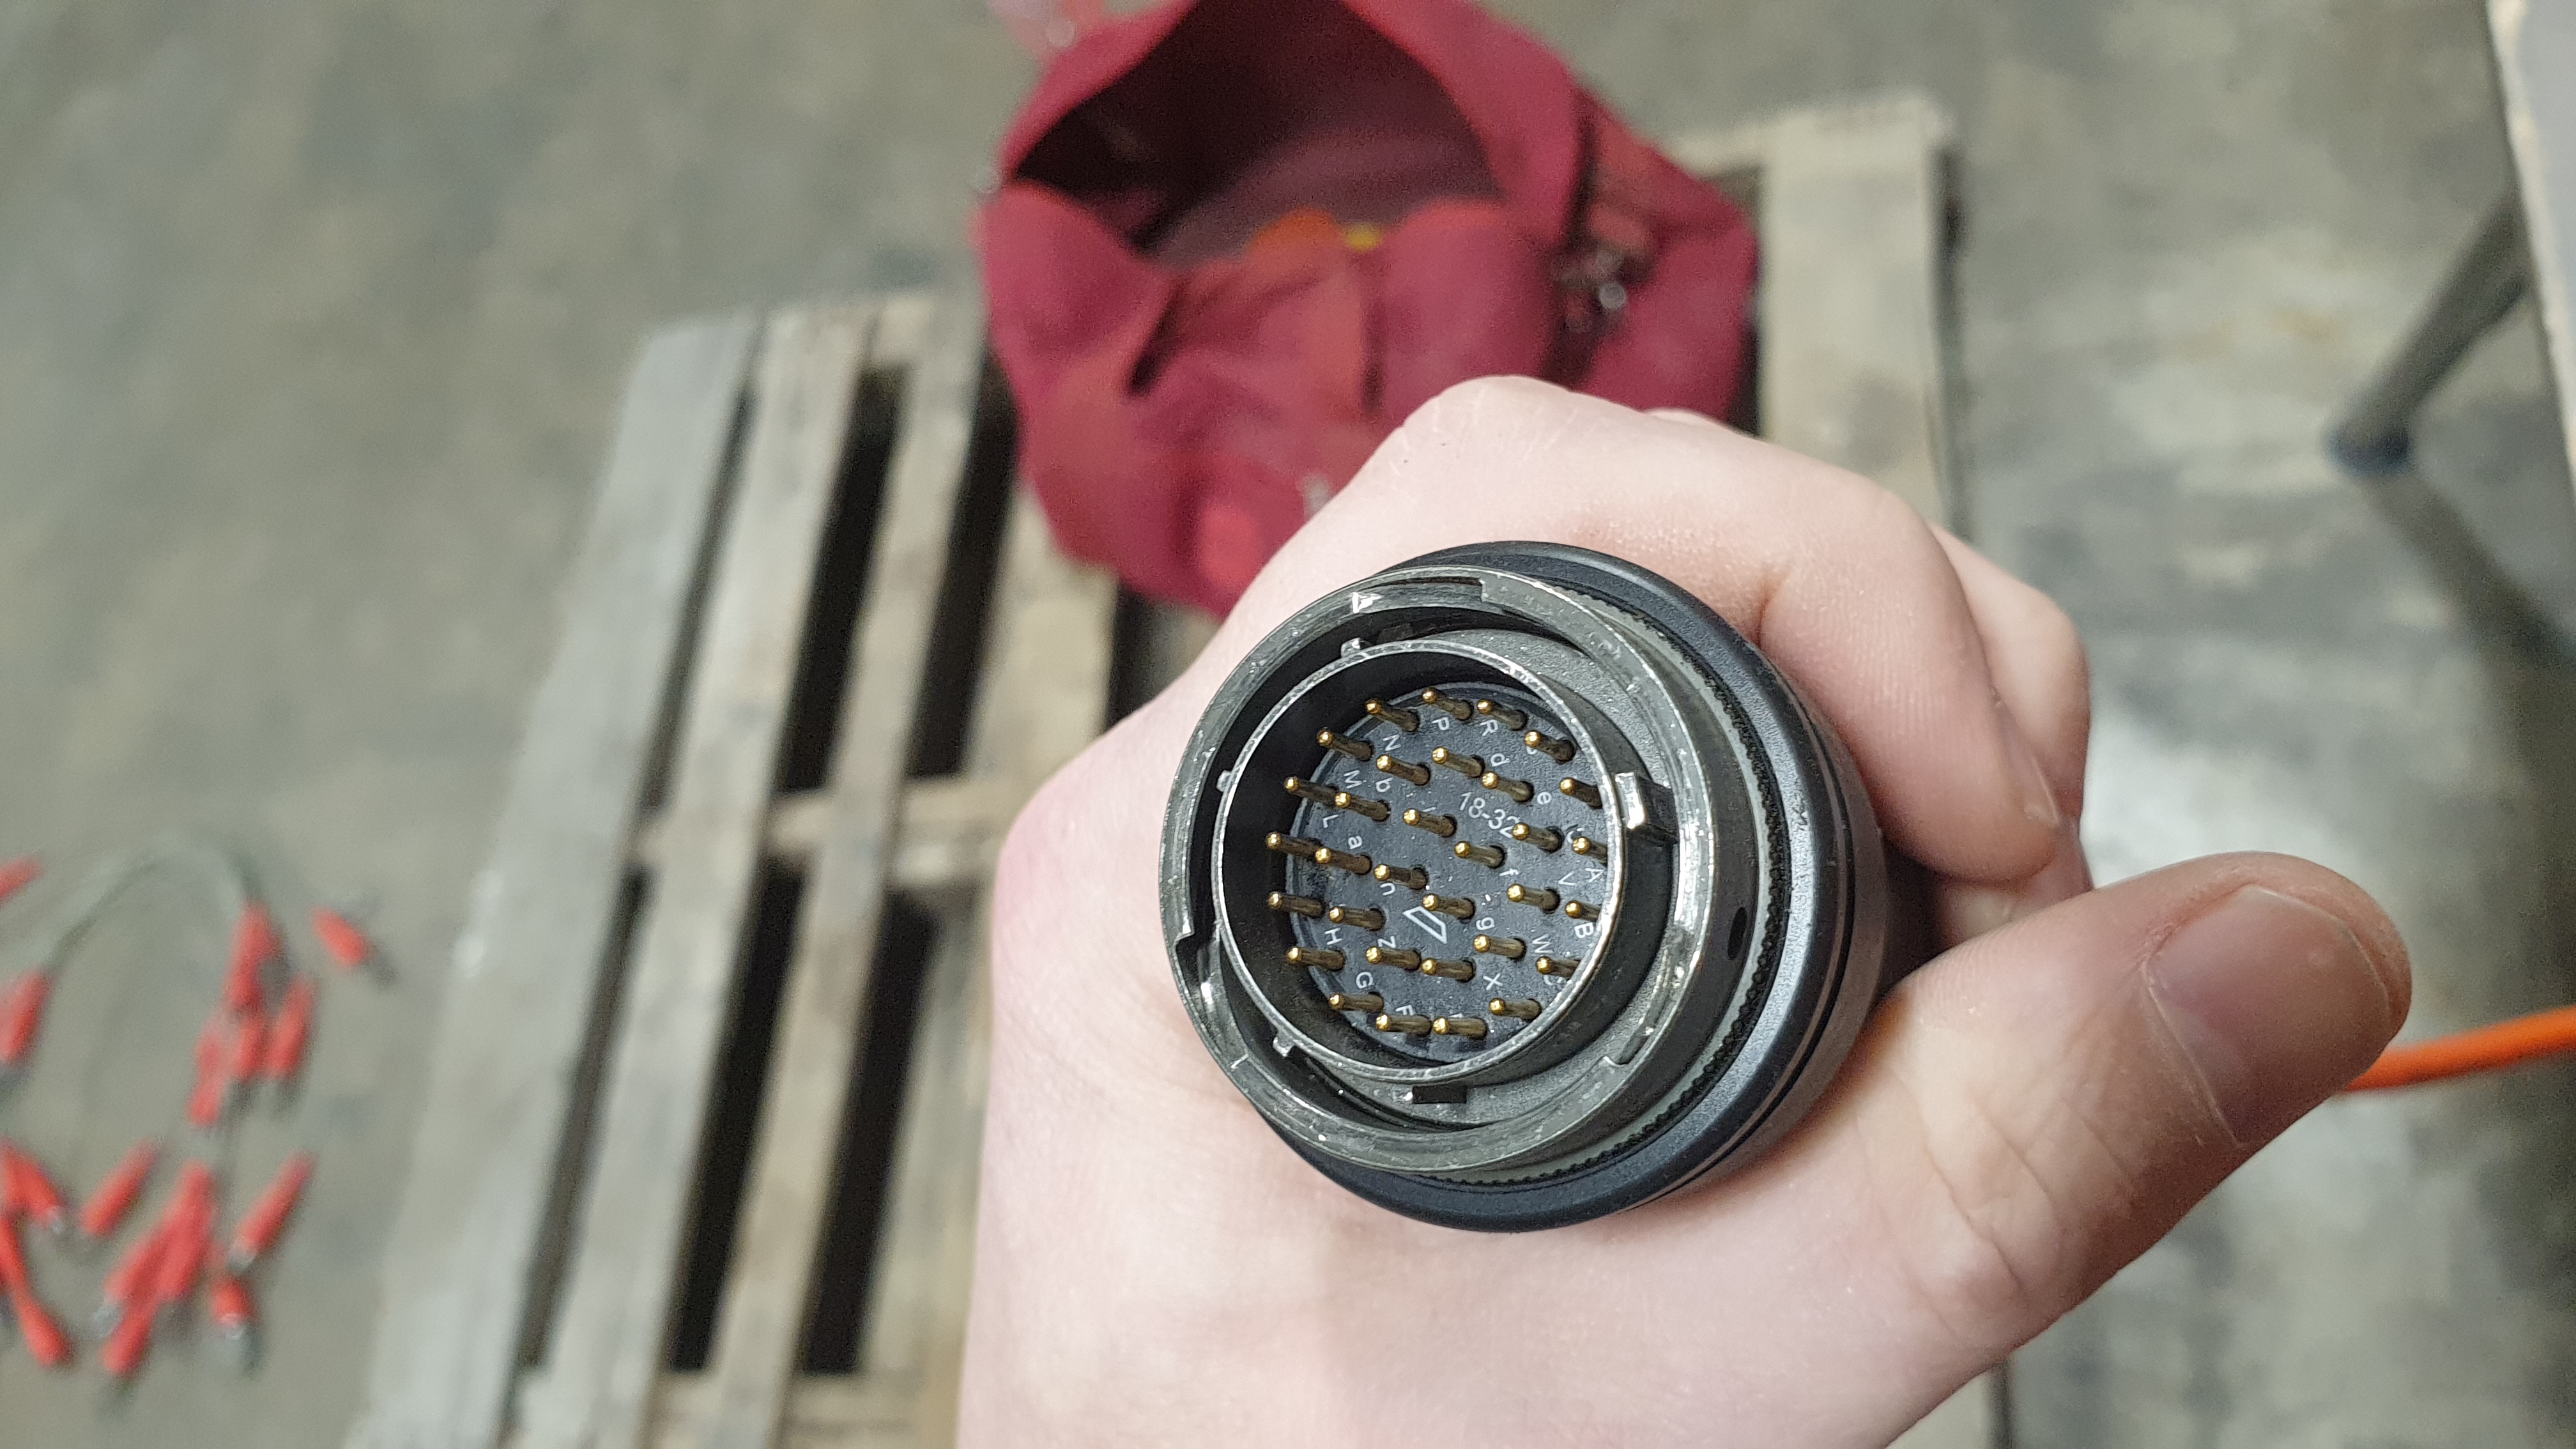
I just kind of like it. Connector inspections -- something every geophysicist learns to be anal retentive about if they last long enough.
all 13 comments

sorted by: hot top controversial new old
[–] 10 points 2 years ago (3 children)

Oooh, electronics engineer chiming in here, those connectors are pretty cool and expensive. I've worked with them at a previous aerospace company. They're great for wiring up because they're keyed for only one way and the key is off-centre so you'd have to be an idiot to fuck up when following the wiring diagram. The trick is to not let an idiot draw the wiring diagram.

Source: have been that idiot at times.

  • source
  • hideshow 6 child comments
  • [–] [S] 3 points 2 years ago (1 child)

    Have you had to do the soldering portion before, or has it always been technicians? If I was a junior technician doing a replacement on one of these, what advice would you give?

  • source
  • parent
  • hideshow 2 child comments
  • [–] 3 points 2 years ago (1 child)

    I didn't do the soldering on it, though I would have liked to as an escape from my former boss (that's another story), but I did watch the technicians doing it and from what I remember:

    • First, double check your wiring diagram at both ends. Had a right fun time explaining to my boss the reason for the days of delay was whomever did the connector on the motor/gen socket had wired it up backwards because they hadn't flipped the wiring diagram. And disassembling that was a bitch.

    • Triple check the orientation you're working from and it's always better to borrow a second pair of eyes than redoing it.

    • Make a spreadsheet with the connections and print it out large on A3 paper (or US equivalent size).

    • Read the connector documentation a few times and have a go at disassembly then reassembly without the pins.

    • Cut your wires to the required length and bundle them together into a harness using kapton or electrical tape.

    • Make sure any glands that need to go over the end of the connector are slid over your wiring bundle

    • Work from the centre out, it makes pin insertion much easier.

    • Double check before inserting a pin until it clicks, they're more difficult to remove than insert.

    • Check both ends using continuity on your multimeter after each insertion (if that's possible) and mark off the connection on your A3 sheet using a highlighter.

    • Run a continuity check after you've inserted the last pin.

    • Finally, slide the gland fittings and thread into place.

    Please verify this advice yourself as it's been more than 4 years since I've worked with these connectors and you should never blindly trust strangers on the internet, let alone those giving advice.

    Happy wiring 😊

  • source
  • parent
  • hideshow 2 child comments
  • [–] 6 points 2 years ago (2 children)

    MIL-DTL-38999 connector, size 18, 32 pins.

  • source
  • hideshow 4 child comments
  • [–] 5 points 2 years ago (3 children)

    What kind of connector is this for?

  • source
  • hideshow 6 child comments
  • [–] [S] 6 points 2 years ago

    They are mil spec outdoor connectors for signalling cables. In a geophysics context, we use them to connect a line of sensors (things like seismic sensors or similar). It's a $200 connector on a $2000 cable.

  • source
  • parent