1
Seems to have stuck! I scraped/peeled away as much of the old adhesive as I could first
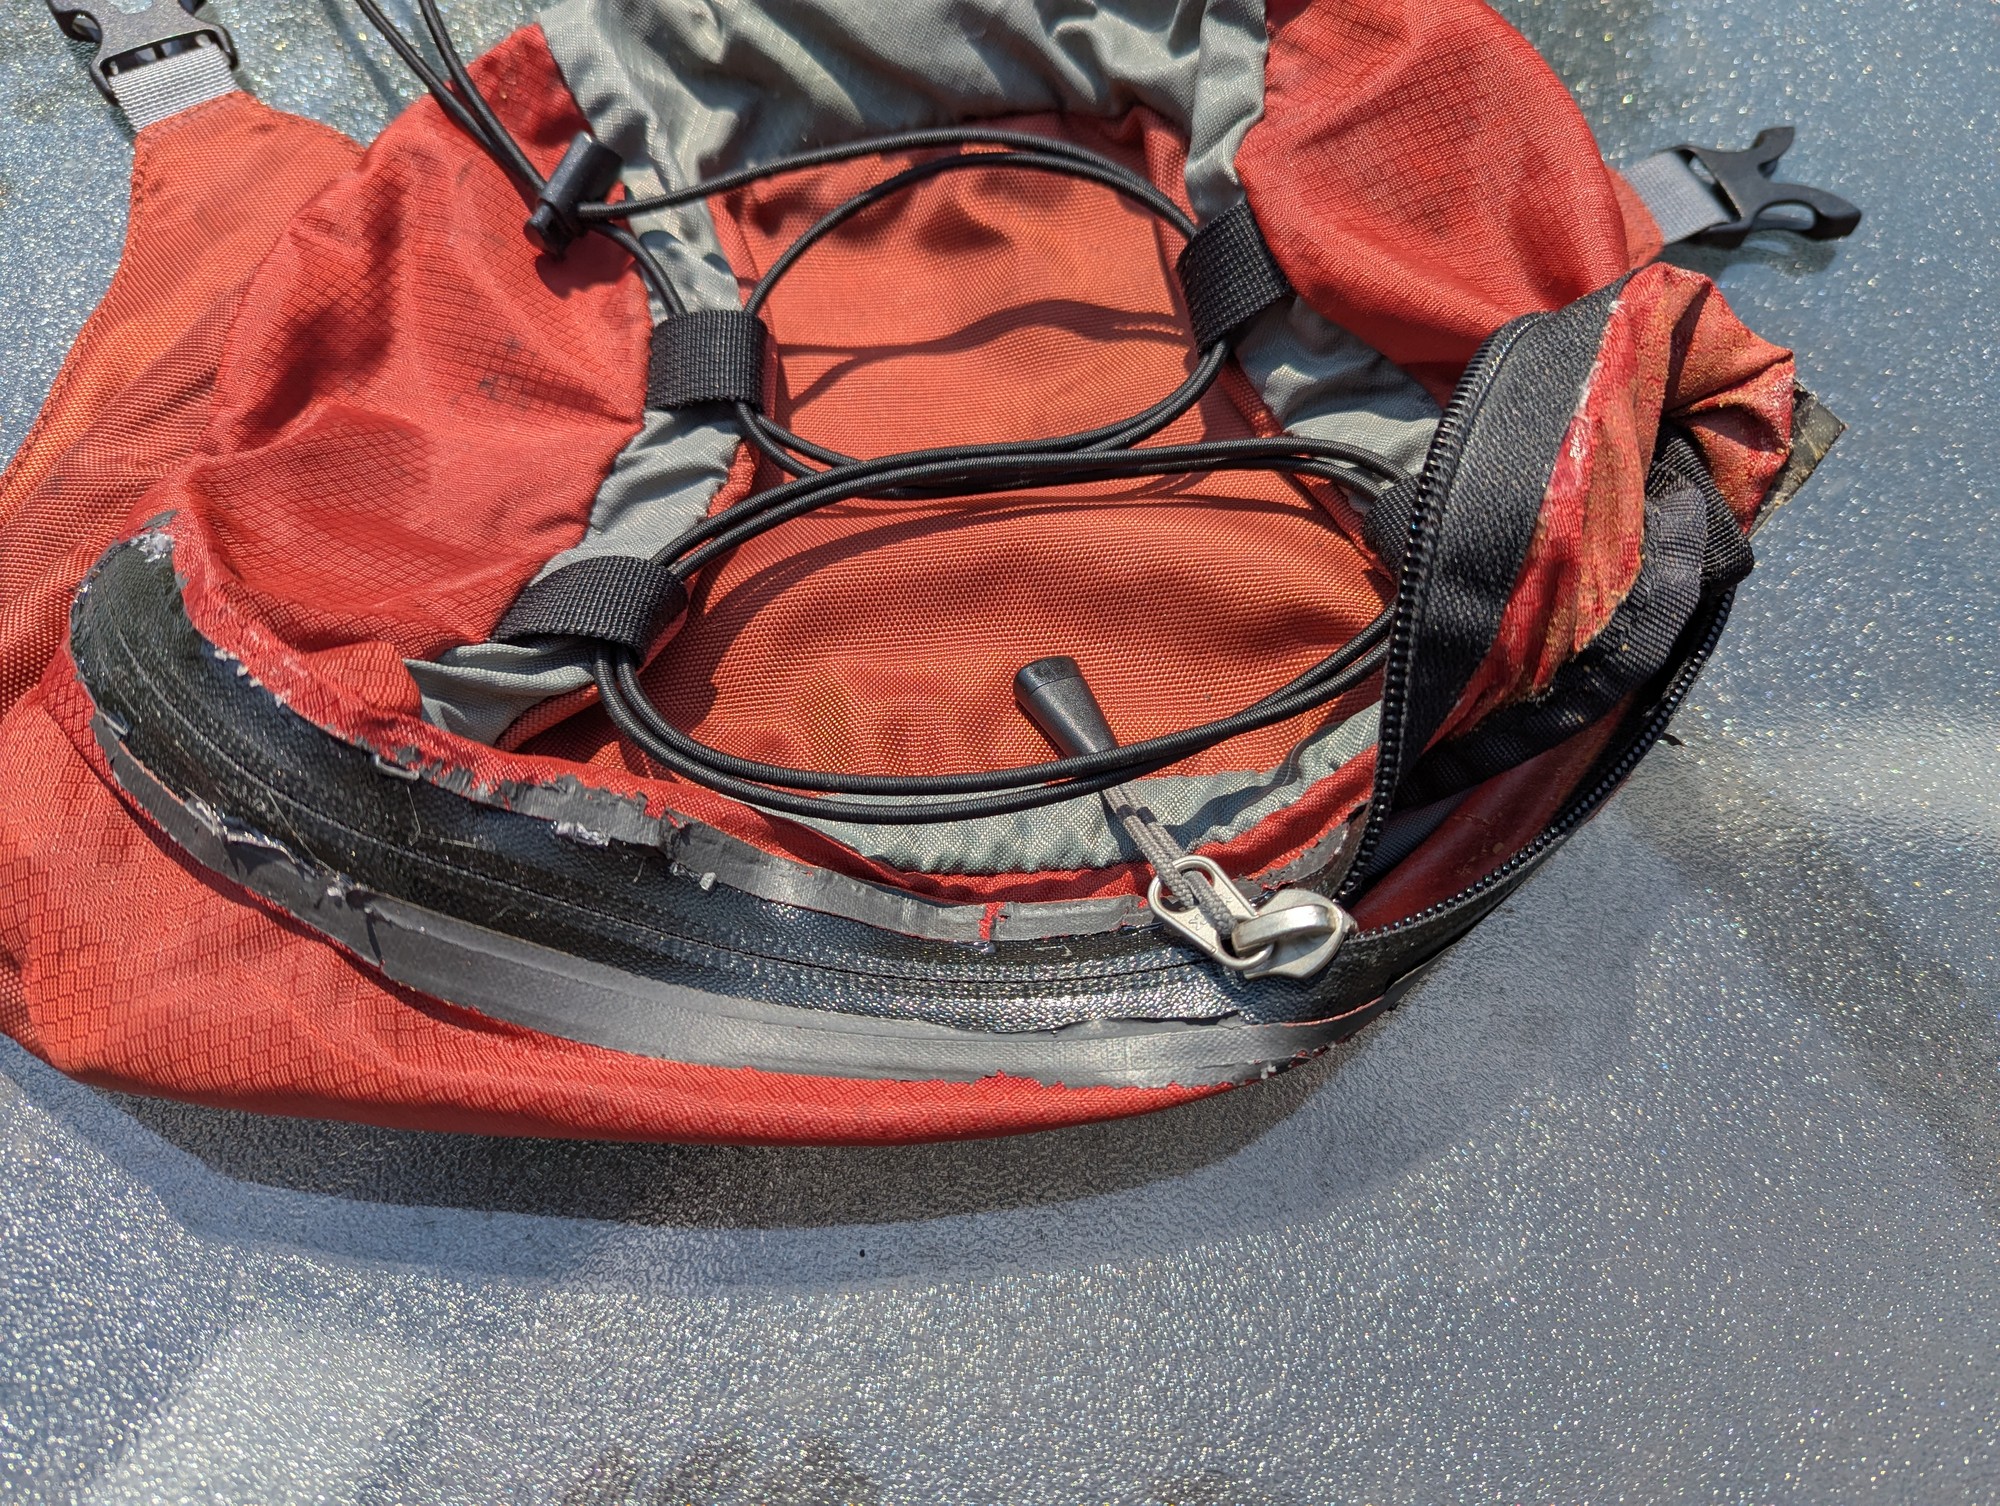
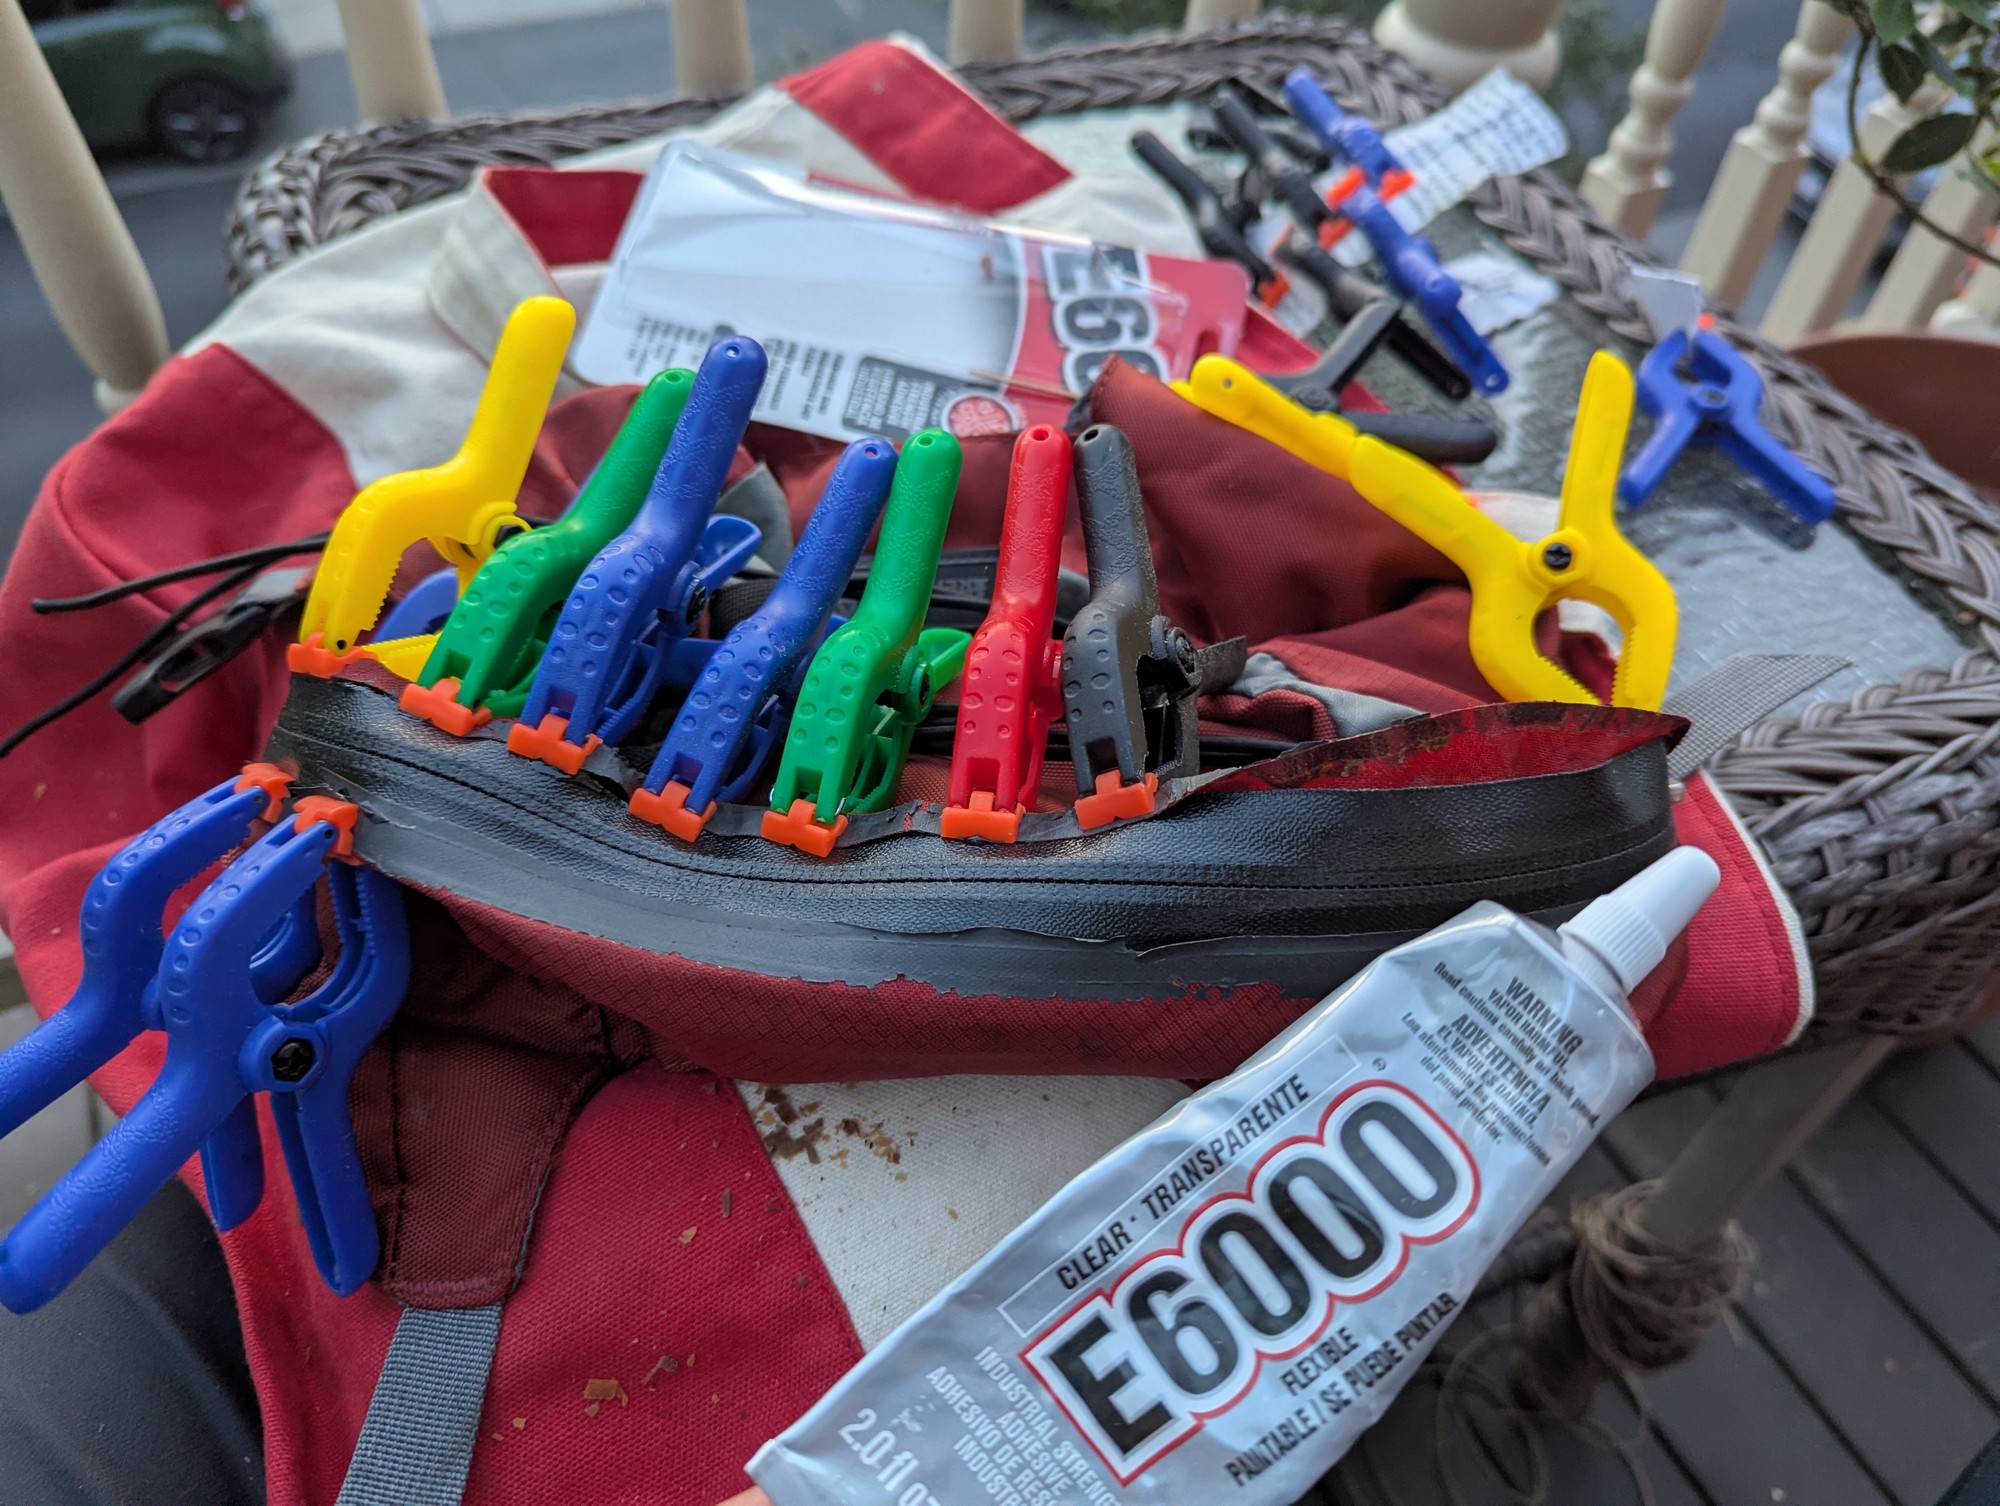
Seems to have stuck! I scraped/peeled away as much of the old adhesive as I could first
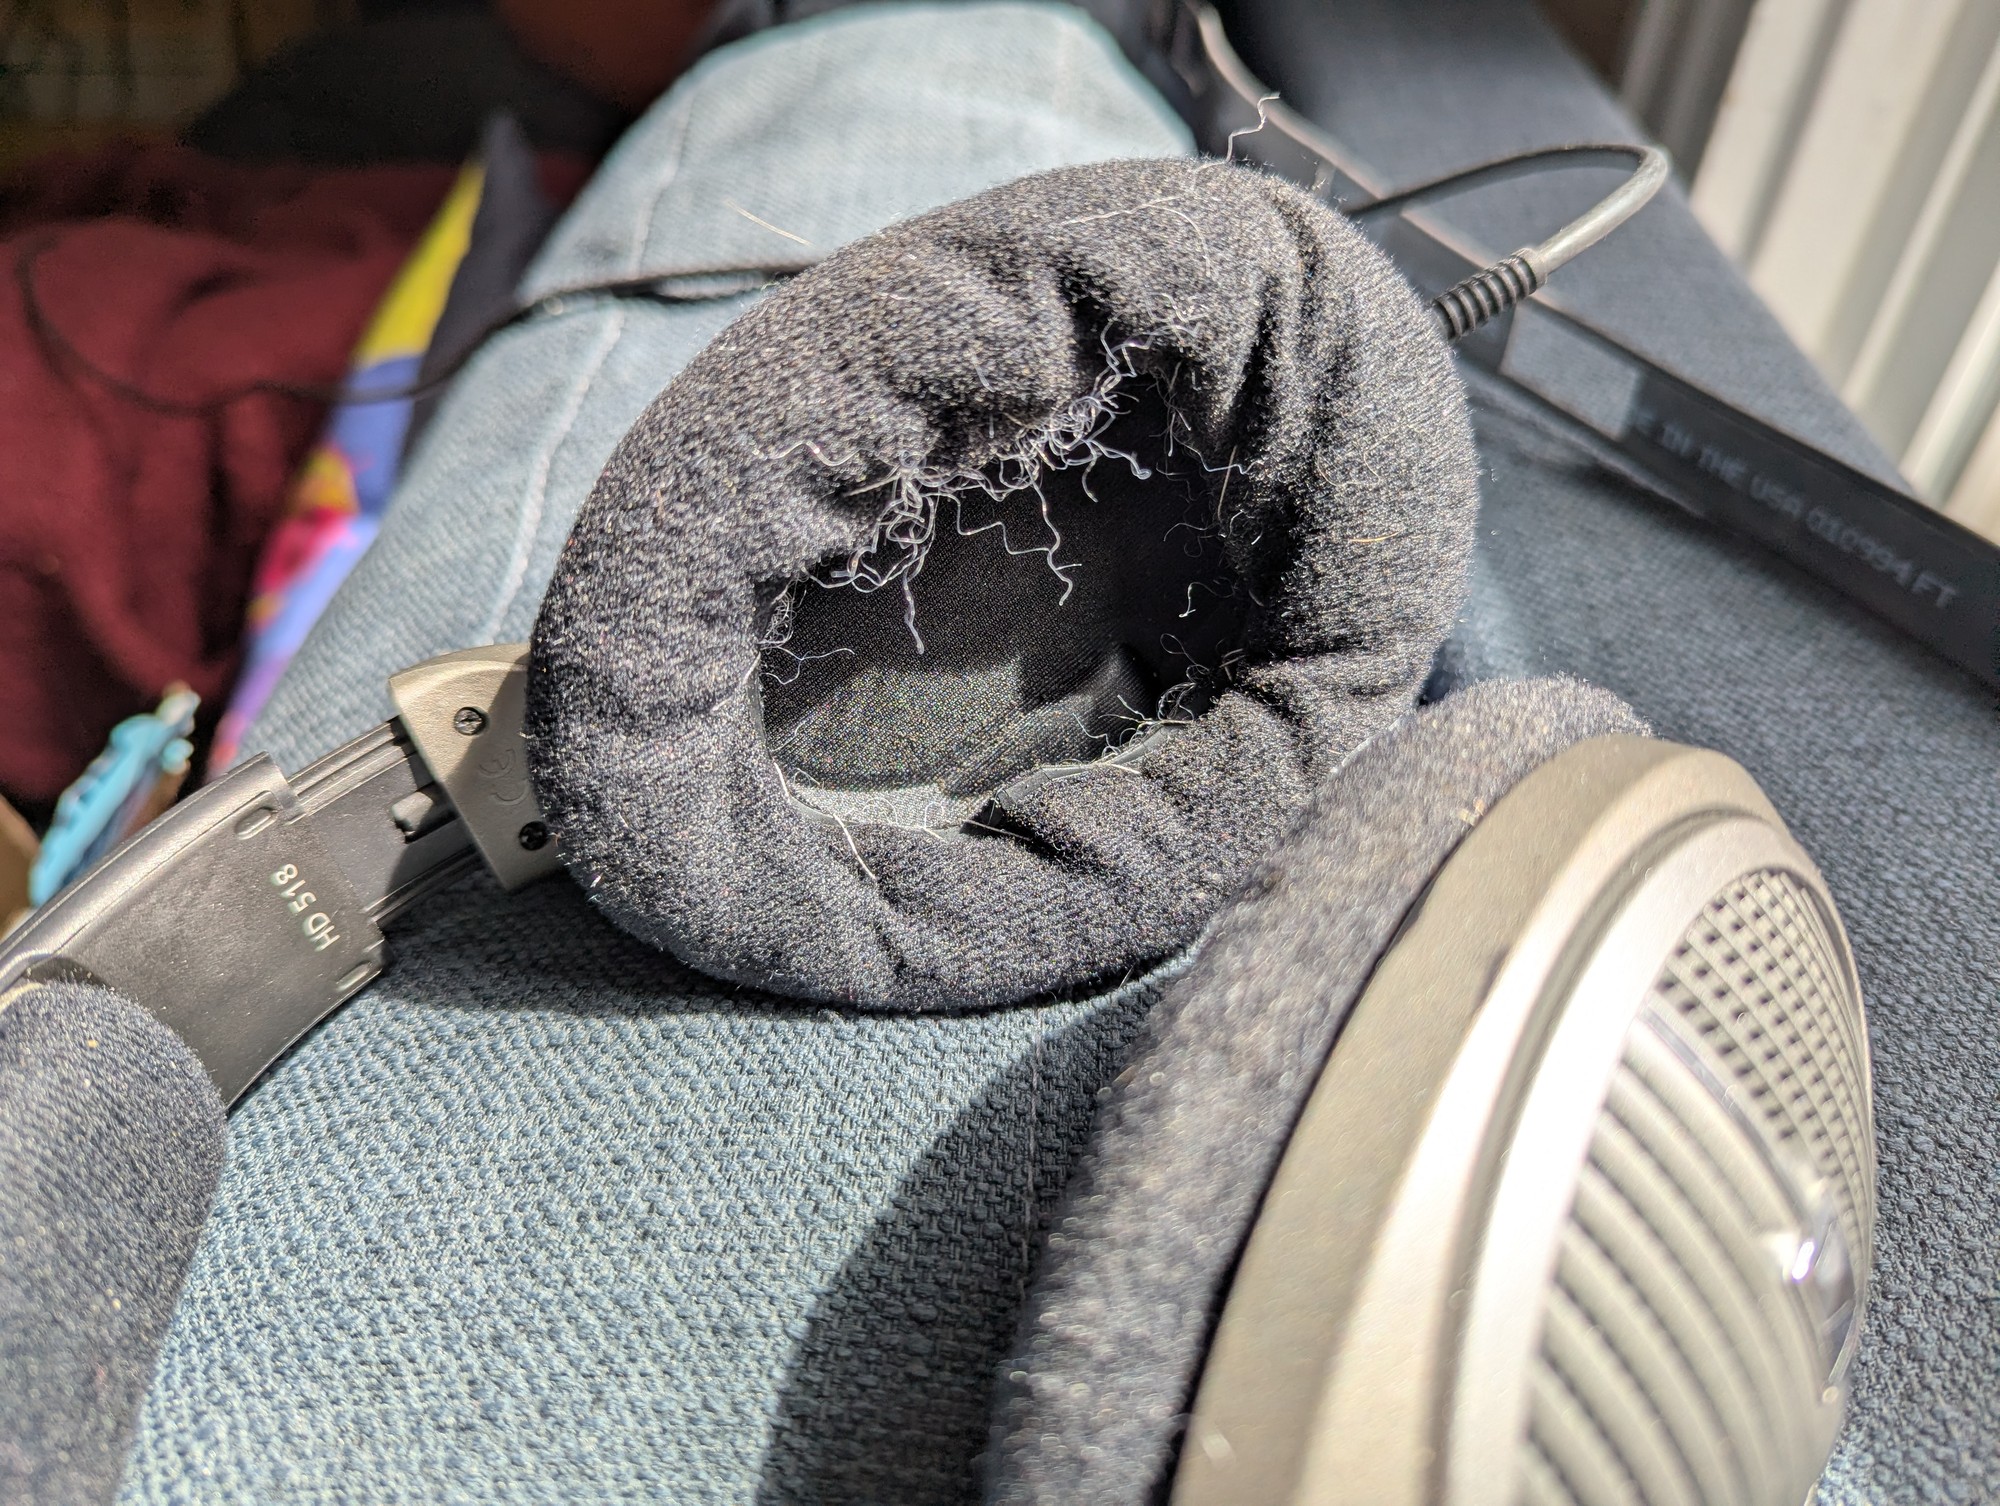
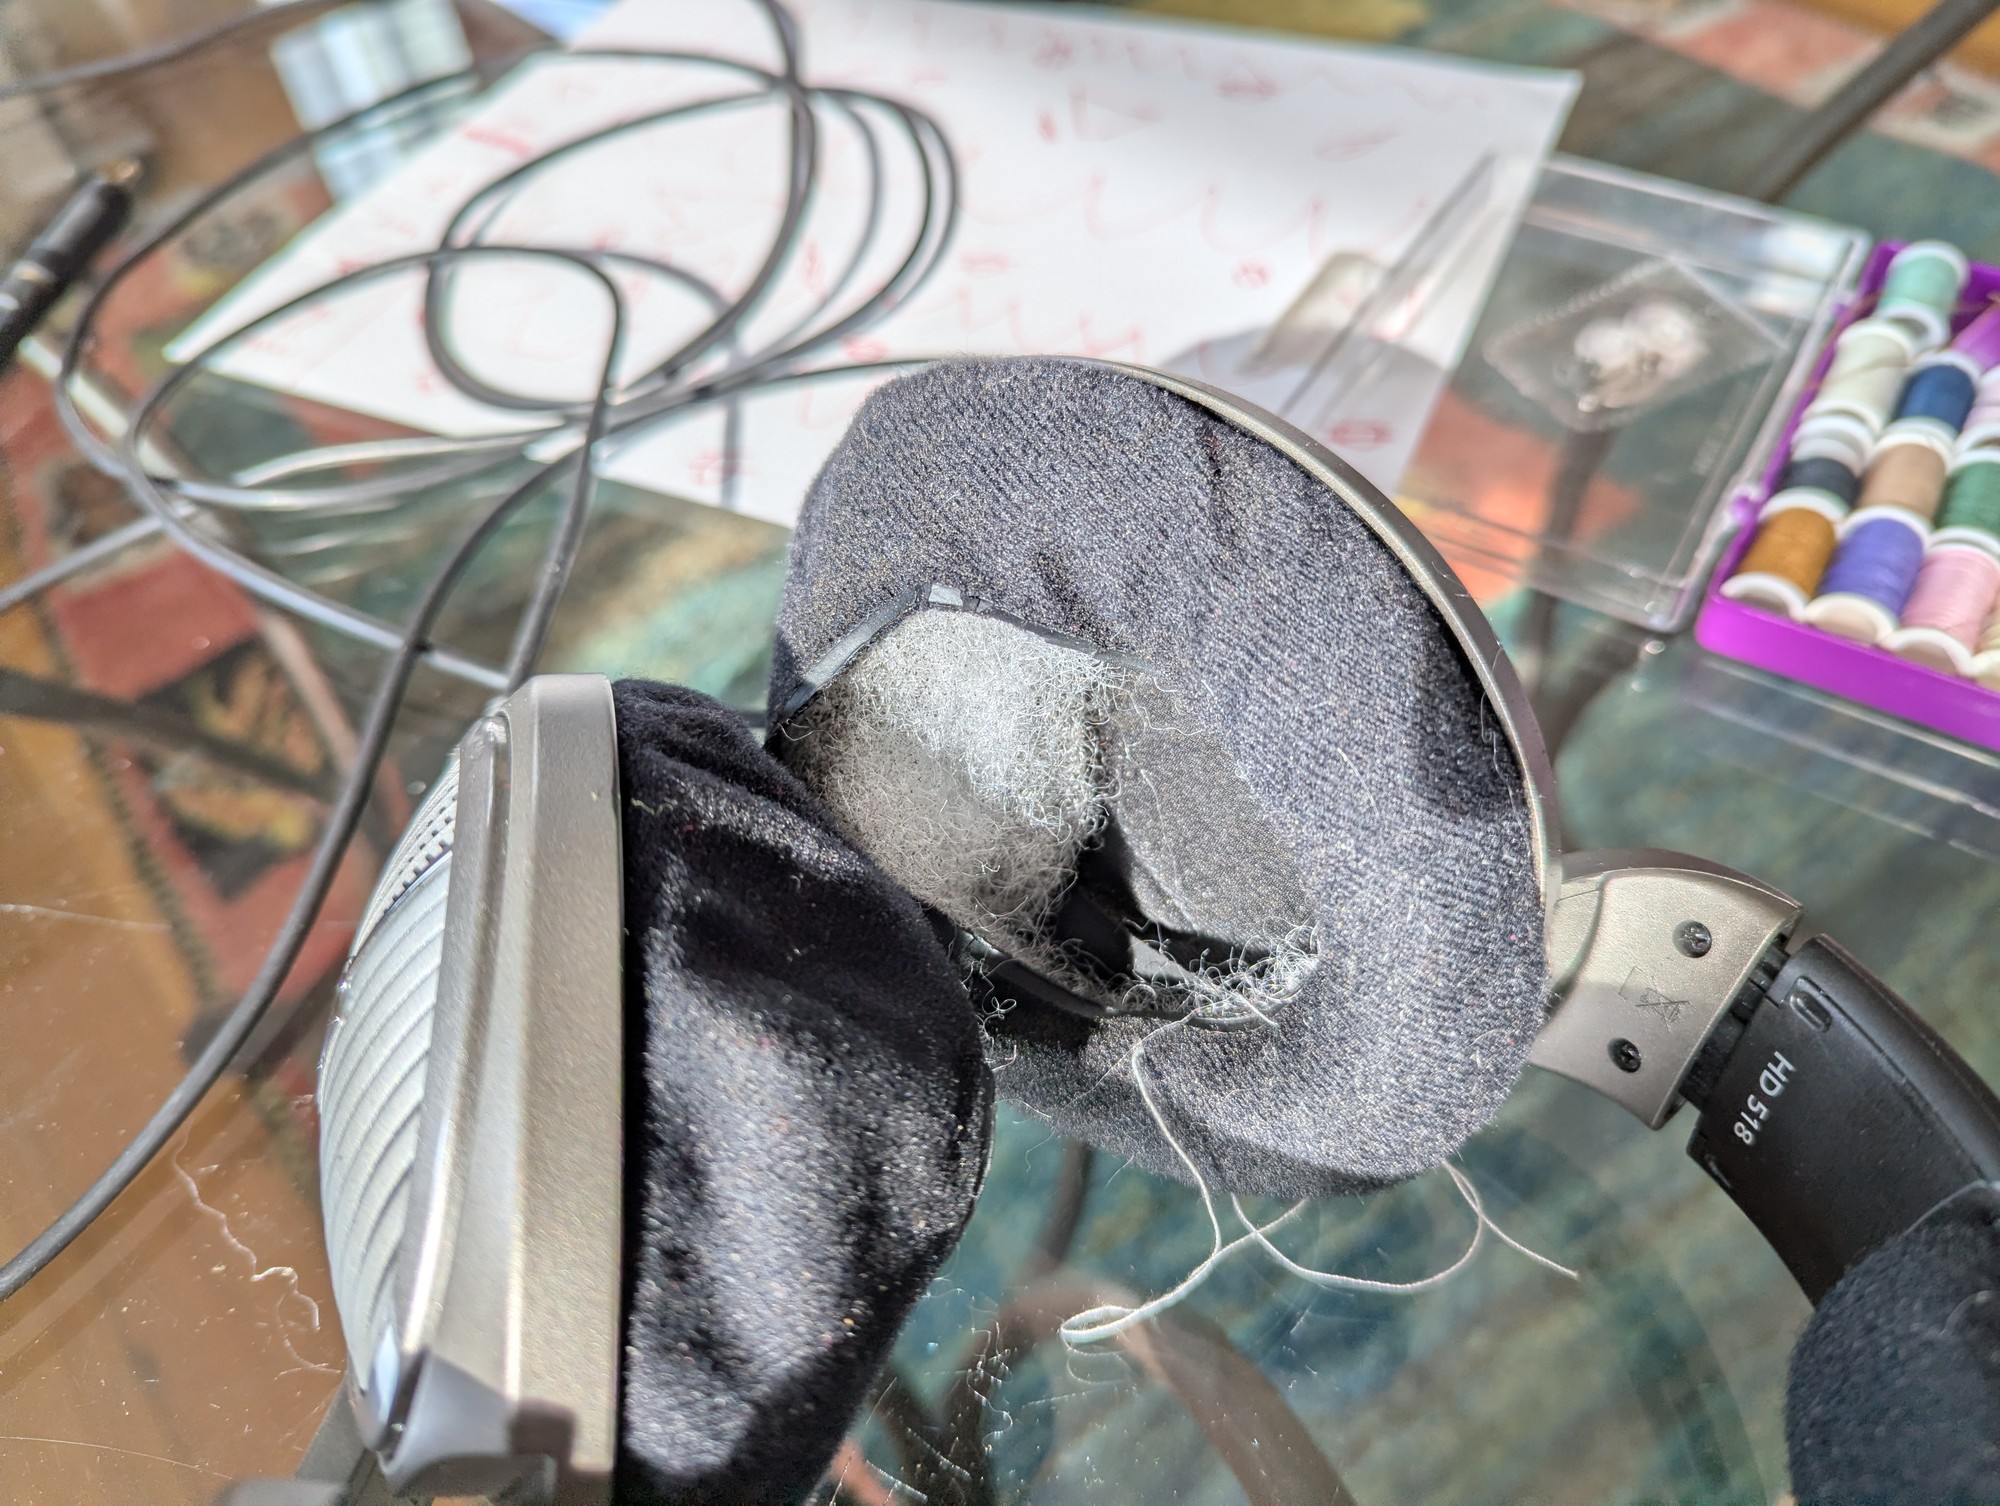
What I had on hand was polyfill. Sewing the ear bags (?) closed was a pain and messy. I think they're originally heat sealed, and the plasticized edges tear through pretty easily. But they're comfortable again for now. If I do it again I'll take the whole foam/bag off and make a new donut to maybe glue on.
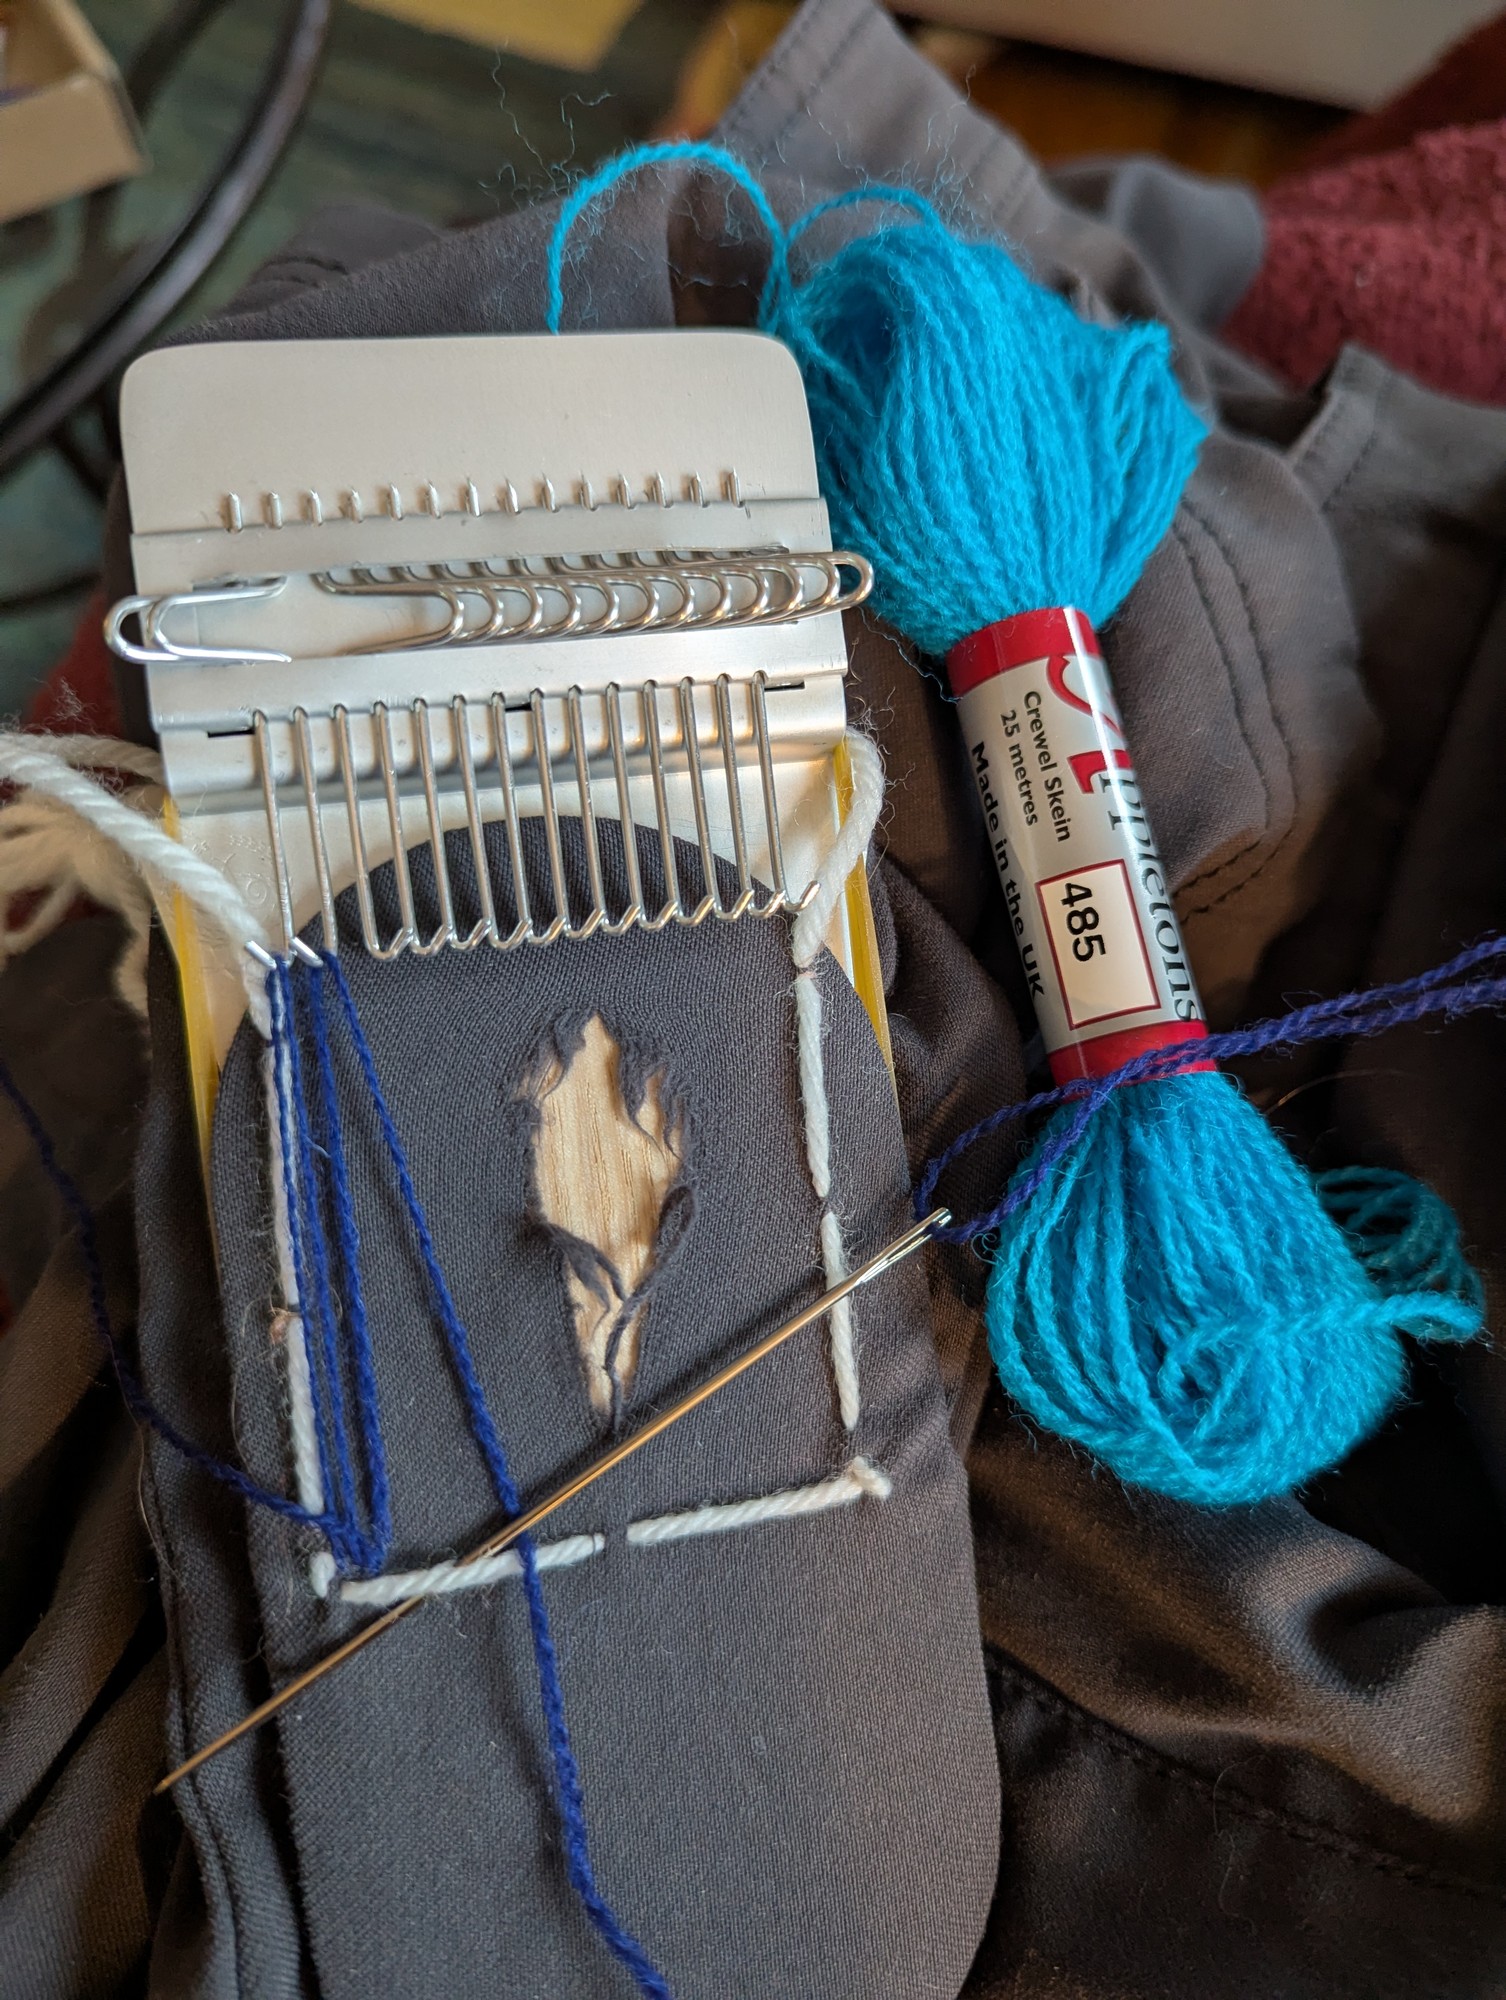
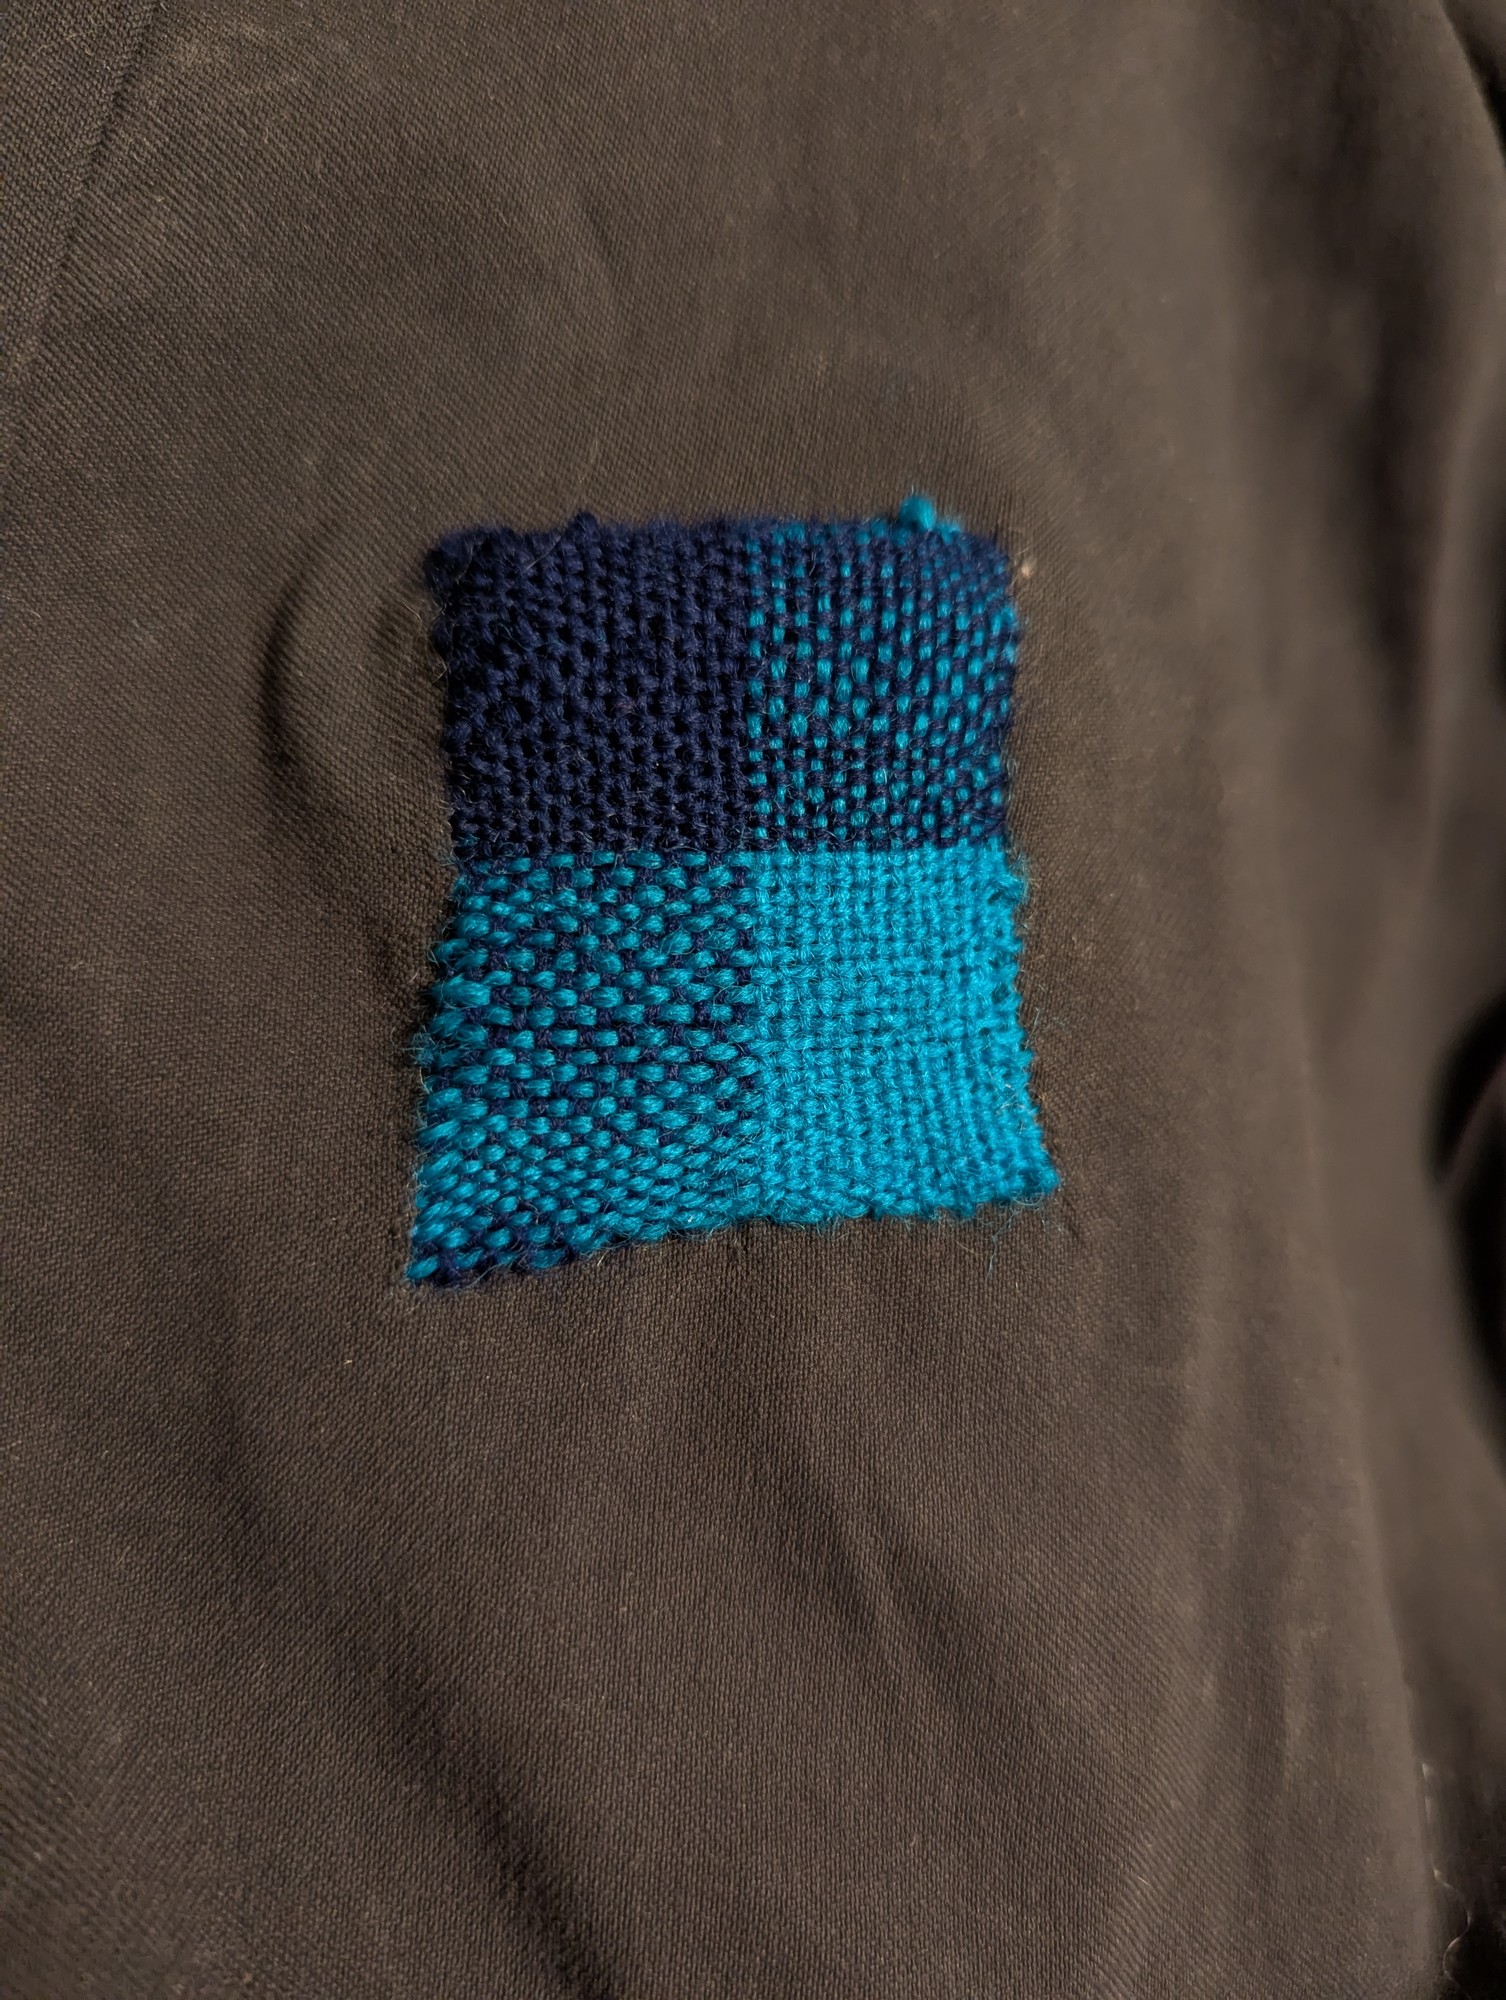
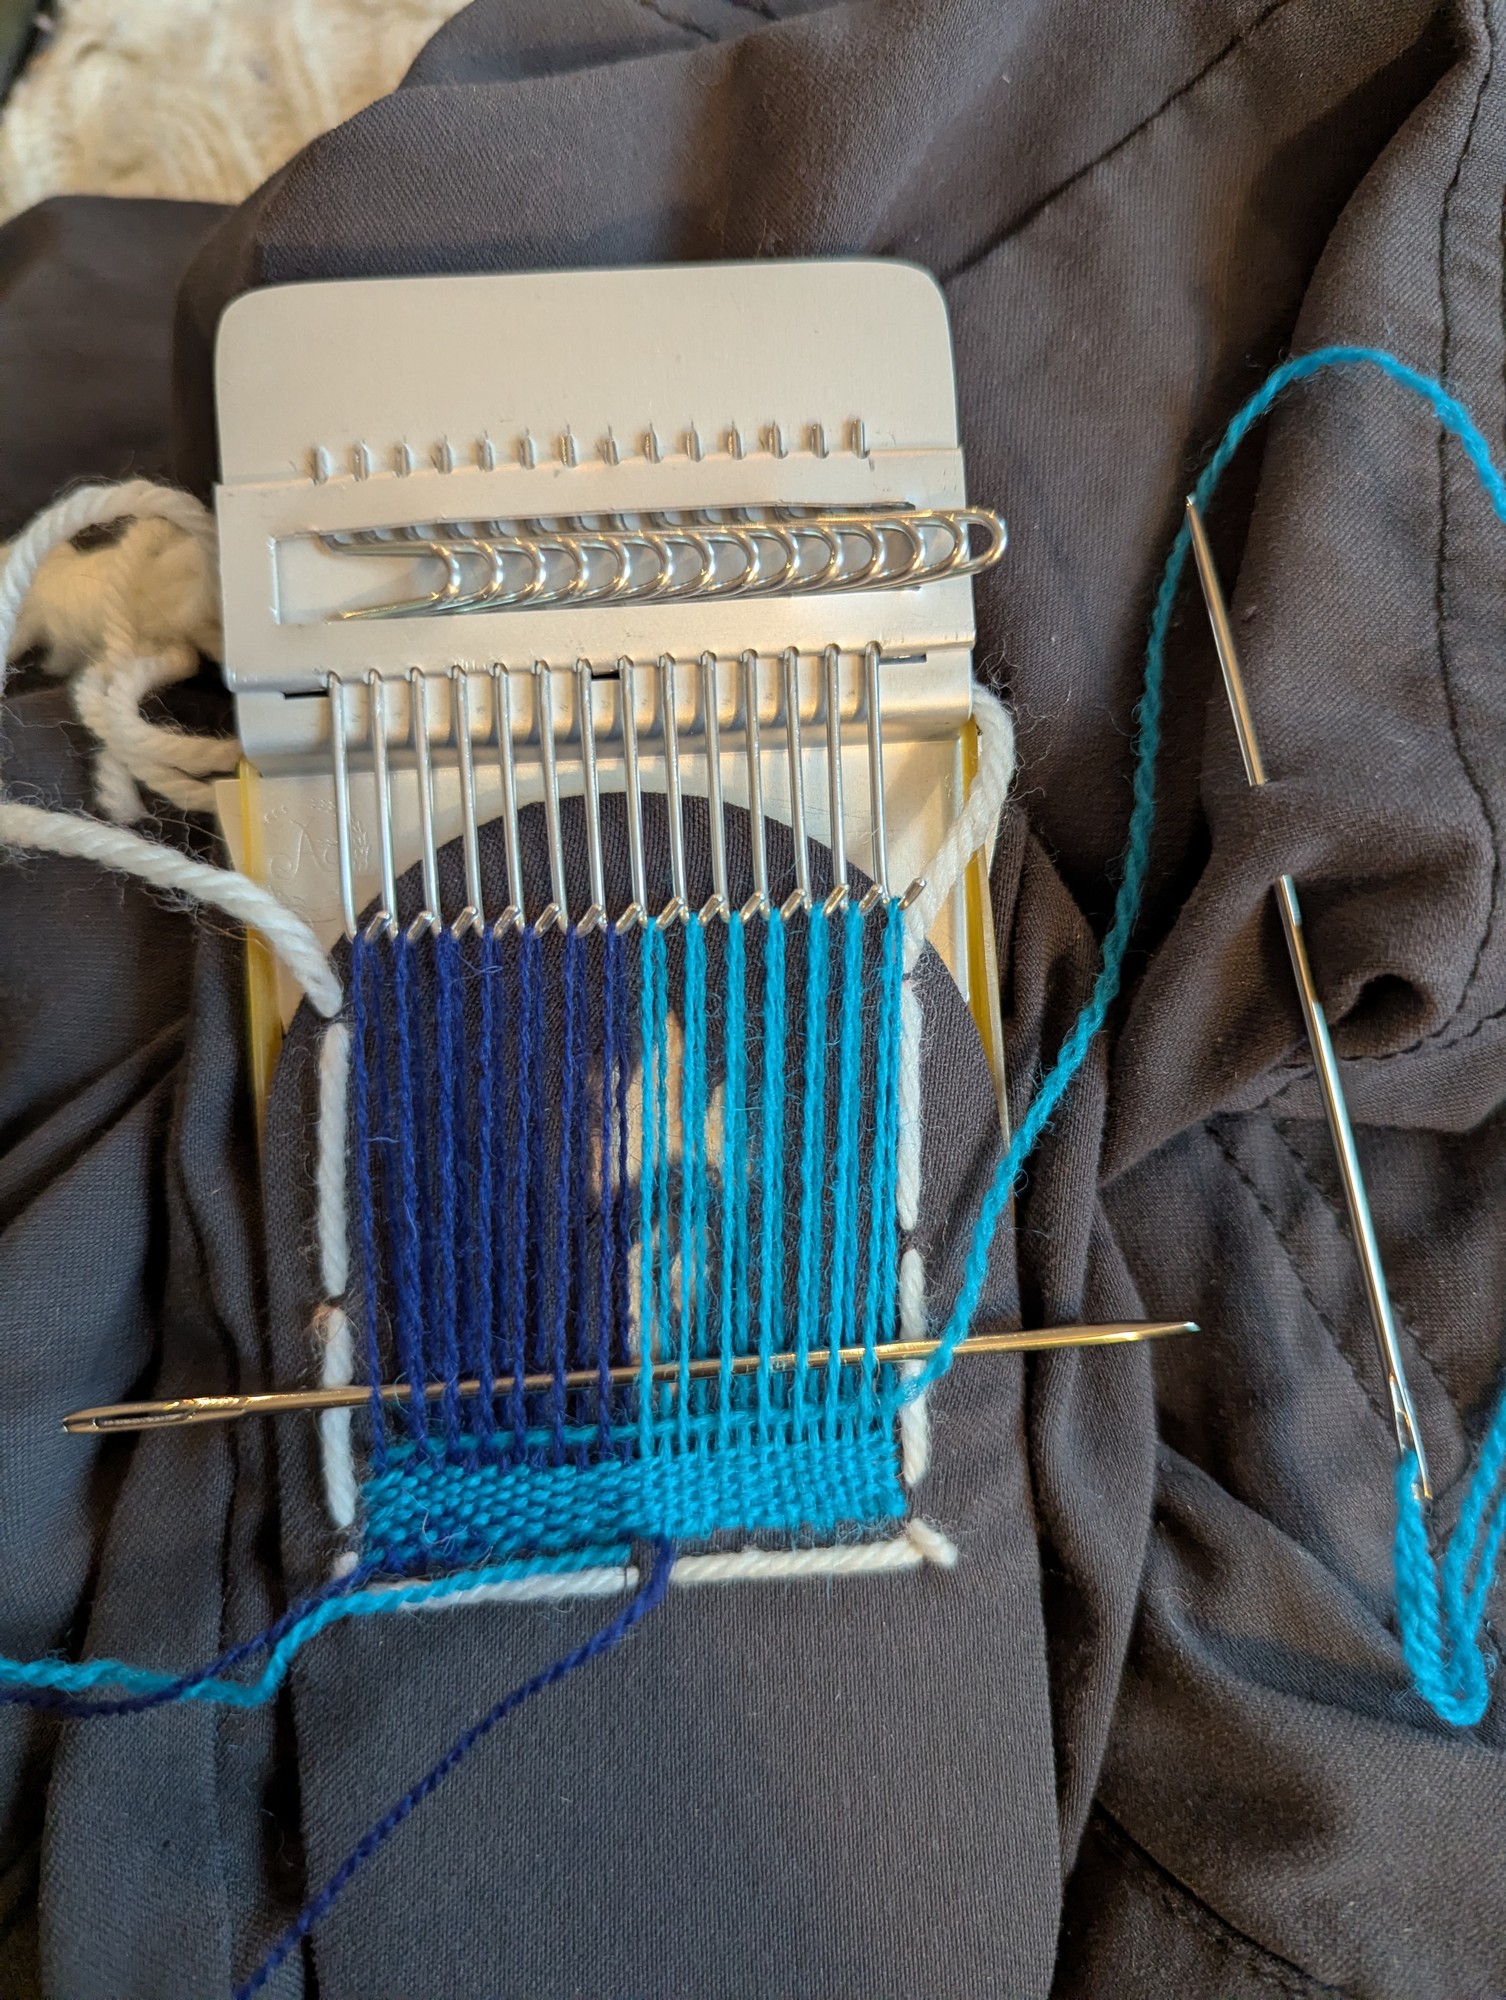
Patching a rip in the knee of pants.
Still working on getting the end result square and with straight edges, but I like it.
Cut it in a nice shape, drilled the holes.

Painted the whole thing, including some foam I cut up for a better seal.
(Ignore the giant mess lol...my family neglected this garage)

I think it turned out nice. Should prevent some spill damage doo.


Temps before and after in the same exact test conditions (same tune, benchmark, no background apps etc). I used Furmark and Cinebench 2024)
GPU before: 62 GPU, 85 Hot, 76 Mem
GPU after: 55 GPU, 78 Hot, 66 Mem (adjusted for +3C ambient)
CPU before: 62C
CPU after: 63C (66C recorded, but ambient was +3C)
No benchmark score improvements but the GPU temp dropped a lot.

UPDATE - I think I fixed it: comment link
Hi
After a thermostat / potentiometer replacement, my fridge produces ice / snow at the back even on the minimum ("min" setting, the one next to OFF).
The thermostat was replaced because the fridge just never turned on anymore.

The cooling plate is INSIDE the fridge because the one in the back wall of the fridge no longer worked. The same person did this too and worked for years with no ice, and we were really happy with it.
I thought this was caused by a clogged drain pipe so I found it, chopped it off completely because it was a botch job (or seemed like it) and replaced it with a catcher so the water still falls in the evaporator tray
Before:


Cleaned it with a long cable and by pouring water with dish detergent down the hole...

After:

But the ice formed back to the same amount within 1-2 weeks :-/
I took apart the old thermostat and found that it has these 2 screws in it.

I destroyed the whole thing to take out the screws completely from inside it, but I could turn them from outside too. What is the use of these? Can I adjust the cooling by turning them somehow?
I suspect that the fridge is now cooling more, therefore is creating more ice. What else could be the issue?
This ice did not use to form before the thermostat replacement.
The fridge / freezer is about 20 years old I think. It's labeled Arctic but according to the guy that fixed it for us, it's actually a rebadge, but I don't remember exactly what brand he said it was. May have been Gorenje or Beko. It has 2 compressors for the fridge and freezer and they're completely separate from each other.
Ideas?

I am adding a UV light to my furnace coils. I decided to cut an access panel for easier cleaning and access to the UV light. I did not realize there were these triangular end covers for the A-frame of the furnace evaporator coils.
I don’t see them anywhere online when looking up diagrams of furnace coils. When I search online, it is also not clear if these covers are necessary. Are these covers beneficial? Or can I take one side off to fit the UV light underneath the A-frame?


cross-posted from: https://lemmy.dbzer0.com/post/67700053
Supposedly, apparently, pros use metal pistol attachments for nozzle-less expansion foam canisters. Does anyone know why?
AFAICT, the pistols are a bit costly. The pistols themselves can get clogged and add a maintenance burden. You need to then buy a can of special cleaning solution (is it acetone?), to spray through the pistol after every use.
I have always used the foam for DiYers: a canister with a nozzle and long plastic straw. The straws are trivial to work with: you twist a screw into the end of the straw when done to seal it off. The stuff in the straw still dries out but it’s easily cleared by plunging it. A coat hanger can push it all out in one piece.
Twice those things have fucked me. I buy a huge can of the stuff and use it for one small squirt somewhere. Then the stuff cures inside the can near the outlet, thus sealing it off. There is no recourse because label even tells you that you’re going to get fucked. The label says “one time use”. Indeed, they expect you to blow the whole load in a single giant ejaculation. WTF? Now I have cans of barely used expansion foam with lots of liquid trapped inside the can. I don’t recall if I tried the spraying it upside down trick to clear the nozzle.
So I have to wonder, is the pro stuff any different? Wouldn’t the pro canister outlet self-seal just the same? A hardware store near me is going out of business and I have a chance to buy a pistol at ½ price. Not sure it’s worth it.

Growing up we always had a garden. This meant fresh veggies and tasty fruit throughout most of the year. And even though I never had a cliché hatred for anything green, I never really appreciated this either. It was just normal.
Moving into a city really changed that, and spoiled me realized that not everyone has a garden. Nor parents that spend loads of their free time dealing with it. So while I’m grateful in retrospect at least, that still does not bring back that tasty salad from back in the days. What does not help either, is that I’m already annoyed by the repetitive watering chores for the few plants that actually do live on our balcony at the moment.
In comes TheStockPot. A youtuber that, among other cool stuff, build a smart greenhouse. While I’m sure he is not the first one with this idea (in fact the farmBot has been in my head for years), it’s his video that sparked my motivation. So if you like watching videos, this is where you should leave the post and just watch the video instead. All the credit goes to him and all I have to add will be some tinkering with electronics from a beginners POV. And some woodworking.
If you are still here, the idea is pretty straight forward: Take (or build) a greenhouse, lob some sensors in there, add a water pump, connect everything to Home Assistant and get an infinite supply of vegetables without spending time watering or going to the supermarket. So like any sane person, I ignored all the financial and time consumely implications and set out to build something alike.
The system is based on an esp32 board with relays. A microcontroller with wifi that nicely integrates into Home Assistant.

The relays allow supplying any odd electrical device with up to 230V. The "original" uses them to power heating mats to better manage the temperature inside the greenhouse (which I don't). I used it because I didn’t think and just did what the video did. Actually I currently only use it to power one 12V pump. Speaking about 12V: I picked a 12V membrane pump since the board also takes 12V. This way I only need to run one power cable and there is no need to mess with high voltage. For sensors I used a DHT11 (air temp and humidity) and multiple DS18B20 (soil temp). Since I don't run active heating (or cooling) atm, these are not really required. They were wired in because they are cheap and I like data (and heating might get added, who knows). Lastly there is a simple float switch to turn off the pump when my water container runs low (I don't run tap water).

Everything is stuck together with some resistors on a prototyping board, which I did for the first time. It was super doable for a solder beginner, and I learned quite a bit! Sticking multiple sensors together and supplying things with power made me think about what's going on and how to get everything connected with as little mess as possible. Way more interesting (and challenging) than following some laid out tutorial.
Don't solder everything to the board but make it disconnectable would be my own thought to share, for everything else there is more qualified people out there.
ESPHome is super cool! If you run Home Assistant and want to integrate some custom devices, definitely give it a look. It’s a convenient and easy way to program your hardware. One maybe helpful note: Starting out I ran the ESPHome Device Builder on my Home Assistant instance (= a Raspberry PI 3). Compiling was really hard on that little guy and took forever. I switched to running a container on my local machine which made the whole process a lot quicker. Also make sure you have access to a USB to TTL adapter to program your board. Regarding the code I’ll happily point you to TheStockPot blog, which I used as a base for my own greenhouse. Biggest change I made was to remove the heating and add a float switch that prevents misting when the water is low.
In addition to that, I added a temperature sensitive automation in Home Assistant. Every time the temperature falls below 3 degrees C it disables the pump. This way I hope to prevent it running when things start to freeze.
Building the frame from wood has the obvious downside that it will probably likely rot and the upside that it was free. Most pieces are planed roofing timber that I notched on the table saw. Notches for the windows were also cut on the table saw. Other than a little miscalculation in the width, everything went smoothly.

Throw in some preowned hardware, and this was the cheapest part of the build. One of those cheap, plastic skinned houses would likely do just as well (likely better due to better isolation), but where is the fun in that?
Like (almost) always: It was a fun journey! Like also almost always: It was pricier than expected. Other than the controller and sensors listed above, I spend quite some money on other electronic related items (enclosure, prototyping board, wires, standoffs and other tiny bits). So from a financial standpoint, I don't think it'll pay for itself any time soon (in particular since I already have a version 2 in mind).

From a non financial standpoint it was (and is) a super enjoyable project! Starting with the first click of the relays, to wiring with a prototyping board, to checking my PlantStats™ every day, to watching my little plants grow. There was tons to learn and there is tons to improve! Some in this version some in the next. I still have to work on the watering schedule and the perfect placement for my misters. Also I might need to seal my housing a little better.

Bought an old Car Seat and weldid it on to the remnants of my old office chair. With a bit of steal tube in the midel, since the hidrolic hight ajustment was to long.

We have two sets of glass doors and one of them is missing the screen door (thanks previous owners) - any idea who might sell a replacement?
From all of the ones I've found, they all seem to be double rollers where the top ones just push against the top - ours actually hang almost like a zipline (you can slightly see the wheel at the screw)
I'd love to do this myself instead of replacing the entire door but cant actually seem to find someone selling a kit..
Any ideas? The only other idea I have is to just use a retractable, but having an actual door would be ideal.

I’m trying to coordinate a repair from a far distance - overseas. I am told the shower drain leaks because the fiberglass showerpan flexes (it was likely not bedded properly, installed by amateur house flippers that did not know what they were doing). A plumber came and replaced the drain pipe for a rediculously high cost. Did not fix the problem. They abandoned me.
One option is to remodel.. tear out the showerpan and redo the subfloor which is likely rotton wood (guessing). But I really want to avoid crazy costs. It seems to me like there should be a way to do some perhaps unconventional plumbing. A crawl space is below the shower.
I hate accordian drain pipes. Probably no self-respecting pro plumber would install one. But in the case at hand, it seems like it would solve the moving drain pipe issue.
Another thought, and what I hope someone can advise on: What about a short rigid drain pipe that goes into a rubber gasket-like fitting (e.g. like that in the attached pic), which then goes into a bigger pipe? Wouldn't that tolerate a slight amount of vertical movement as the showerpan flexes? Note: the pic shows an accordian pipe going into the rubber fitting -- that is not what I mean. I consider the accordian pipe a competing option. I want to know if a rigid pipe can be inserted into a rubber gasket fitting.
If I do bite the bullet and install a new showerpan, fiberglass seems like a bad choice. Why is that still being used? In fact, I think enabled metal showerpans are an older technology, but they seem more robust. I have one in a bathroom which is bedded on air (i.e. just the perimeter of the showerpan is supported). But the thing seems bomb-proof. It will never flex.
Why is plastic and fiberglass used? They require proper bedding, and the bedding can always fail later on. I’ve seen videos were ppl have to later on drill holes in the shower pan to inject expansion foam to add support after support is mysteriously lost. Fuck that. Is it that plastic and fiberglass are not as cold feeling when you first step on them? I cannot think of any other advantage.

So this place was made into a duplex and they forced a hot water heater into a small closet. Maybe I'm not understanding properly but why is there not a hot water Shutoff valve there? The hot water wasn't shutting fully off on the tub, so the valve stem likely just needs to be replaced, not hard.. quick cheap replacement usually... But when I went to shut off the hot water I found this.
Side note, I also found their was no exhaust vent for the dryer a couple years ago, we had to have someone cut a whole where the exhaust was ran, but just sat up against the exterior wall with no outlet. (Obviously a fire hazard). Shit happens, but am I wrong that a shut off valve should be there?

We have two dogs, which mostly get along fine. But have fought in the past. My wife just got a new job that is not WFA, so there is not always someone at home with the two of them.
The older dog stays in our bedroom, while the younger one in the living room, with the run of the house.
We also have cats, and they have litter boxes in our bathroom, so i keep the door cracked for them to. come and go. But my son's big orange cat pushes the door open enough the older dog can get out of the room.
Today when I left the house i took a piece of rope, tired it to the doorknob (door swings into the room) on the room side of the door, then using a caribeaner connected the rope to the curtain hold outside our room. This prevented the door from being pushed open any further, however when I got home the dog had pushed the door closed, preventing the cats from getting to their litter boxes.
I am looking for something cheap, or hopefully i can make, that will hold the door in place, open just enough for the cats, but not the dog.

I was looking at something like this, but we have a sweep under the door that would prevent this from working.
ETA: The rope contraption

The sweep, because without it the cats that sleep outside our bedroom at night, fight with the cats that sleep inside our bedroom at night.

so I got a bunch of old Macbooks lying around; they can be had in the $20 region locally in varied states of decay. fixing them up is cheap and easy, so it's an inexpensive hobby with potential resale upsides. so it occured to me it'd be fun if I could paint them; cheaply of course, can't outsource this to professionals.
tried searching for successful projects but came up short. I believe the main hurdles were:
this is kinda what I had in mind:

you got any pointers on what and how?
Unlike most people these days (at least that's what it seems like) I don't own a 3D printer. But a soldering iron is a little like a 3D printer, I assume: as soon as you have it, you find all kinds of uses for it. And while the project I got it for has long been abandoned, I find myself using it quite a bit. My latest addition were a few helping hands inspired by Matthias Wandel, which beats "fixturing" with pliers and random heavy objects. Which led to even more soldering. And while all soldering guides (of the 1 I actually watched) tell you to take care of ventilation, sitting in your freezing cold room, windows open, and holding your breath makes you really think about all those funny-looking fumes.
Don't get me wrong: I love inhaling toxic fumes like the next person that has bought spray paint to "revive" their plain white IKEA shelf. Jokes aside, work safety is important! The inspiration for this fume extractor was taken from other DIY online posts and I have no way of verifying its effectiveness in cleaning the air. I will always crack a window in addition to using this extractor.
In particular industrial extractors come with some kind of snout - a piece of flexible tube to position the air intake right above the soldering job. This seems very smart, and I almost went to shop for more parts to join the 12V PC fan and the activated carbon filter already sitting on my desk. However, I did a bench test with the setup at hand and decided to not let scope creep get me this time. The fan I chose really moved some air, and it felt like I could arrange my little setup in a way that does not compromise on extraction action too much. The other place where I considered LocLine was for mounting the fan to its stand, which I skipped for the same reason. The last thought that had the potential to complicate things was the wiring. My soldering iron runs on USB-C - I don't have a full-blown soldering station (yet). I have seen a solution online where all power needs kind of merged at one place, which I really liked. Unlike in the post however, I decided against putting all the controls by the fan. The reason being that I decided to put my fan on a stand and add some pivoting capabilities. Messing with switches and cables on that likely top-heavy contraption did not seem like a good idea. So cables will go on the stand, where they are easy to reach and replace (should I ever get to actually installing them).
As stated above, I don't own a 3D printer (yet). So instead of printing this straight forward piece, I spend the better part of my weekend sawing, screwing, glueing and painting this straight forward piece. I made the dimensions up on the fly and cut everything down with my track saw. The circles were cut with a jig for the router and everything went together with glue and some screws.
(
After I had everything together, I decided that this thing deserved a nice finish. After all, it will sit on my desk right in sight. Luckily I had used the cheapest plywood I could find, so I got to do loads of filling and sanding. After enjoying that for a while, I decided it did not deserve that nice of a finish. Even after multiple coats of filler, sanding, and primer, I can still see some wood texture and make out where the screws went (when looking closely at least). Also, I had decided that adding holes for threading inserts AFTER finishing would be a smart idea. It was not - the finish was messed up in the process.

The filter can be replaced through a little opening in the top. Even though it looks a little messy, at least I don't have to get out a screwdriver to do this. If you own a lathe or have to go to the hardware store anyway, I think the top could be fully closed, and rather have some thumbscrews for opening the lid. In between the fan and the filter sheet I added some 5mm wooden strips that were glued to the fan. This way nothing can rub against the blades of the fan.
For the stand, I just screwed a few thicker pieces of plywood together and called it done. This will later hold a switch and some wiring (probably maybe).

(yes, I increased the length of the legs in the meanwhile, hence the different look in the thumbnail)
After having used it a little now I can say: It was absolutely worth it! Soldering indoors feels much more bearable and I would even call it an absolute must-have from now on!
Like with every project of course, there still is room for improvement:

I had a productive morning and some great help. I pulled the trim, built the upper frame, assembled the cabinets and got them all installed. I expect that I will have a light week at work so may be able to get the drywall done at lunch. Now if I can find the right trim.
Hey! Do any of you have ideas for sourcing casing that matches these styles? The reeding isn’t just round, some of them are triangles. And the egg-and-dart isn’t one I’ve seen elsewhere. Take a look:


It took me a while to get back to it due to shipping delays, a funeral, a work trip, and needing to protest, but I had some time today to get more done on the library.
First I installed the next cabinet and cut a hole for the outlet so we didn't lose it.

Next up was getting the rest of the cabinets up and the previously assembled frames in place. One everything was lined up, the cabinets were screwed into the frame.

Here's the Ethernet coming out of the right side. I'll do a drywall install after the rest is done.

Next up is pulling the upper trim down, assembling the upper upright frames, assembling and installing the upper cabinets, and then drywall, trim, caulking, and paint. I'm going to try and get the upper level done tomorrow as I'll have several helpers to make it go faster. I'm currently messaging the local specialty suppliers to try and match the 130 year old door casings in the rest of the house.
Edit: Well damn, image uploading seems to be busted at the moment. I'll make a new post when it works again.
Edit x2: Apparently I can post photos from my phone but not my computer?!?

Today I started the install of the base and uprights. I only had a couple hours to spend on it today, but am quite happy with what I got done.
The first, most delicate and most difficult part was pulling the trim. I want to save it to reinstall once everything is built, and didn’t know what I was going to find.


This little piece was proving tricky, so I tried the long section. It was much easier and I discovered that the trim was actually two pieces.

Eventually it all came off, the top strip in a single unbroken piece, but a bit of cracking in the bigger part. Nothing that can’t be fixed with a bit of glue and sanding though.

And good news! No asbestos, lead paint, mold or dry rot. Hooray!!
Next was putting in the base. I was worried this would be a bit tricky to level, but it was fine on the first try.

Next up was the left upright. It took a bit more to level, but the real problem is that the wall has a bit of a bend to it that required shimming.


Finally, I ran one ethernet cable through the conduit and plugged in the router. It all came back to life! Hooray!


Next up is running the second Ethernet cable and installing the lower cabinets, but there has been a shipping snafu so I’m not sure if I’ll get them done this weekend or not. :-/


Today’s progress on the library. I got most all of the cutting done, and assembled the pedestal base and the rail. Next up is assembling the lower uprights and running the Ethernet. Then pulling the trim, installing the actual shelves, trim and paint.
And at some point I’ll get the ladder installed.
So many crosscuts!

The pedestal is made of 2x10, with cross members to support the cabinets. The pvc is conduit for Ethernet.

The rail frame is the same, just out of 2x4.

Cleaned up shop at the end of the day.

