1
posts
2
3
I added a ton of RSS feeds to our Fediverser listing a long time ago, mostly from niche textile sites, but I always feel weird posting them here since it's not really original content. Also, is Fediverser even still a thing? It still works, but any time I try to do/add anything new, it throws an error.
Anyway, if you do RSS, that's definitely the way to keep up with the more obscure textiles. Even the ones that don't mention having an RSS feed are usually hosted on sites that do by default, i.e. WordPress, Blogger, etc.
For example, check out this cute nalbinded viscacha from 200 BCE to 600 CE Peru:

Or maybe consider a beginner ply-split braiding class coming up this August: 
Or peep this beautiful kumihimo flat braid made on a takadai, just in time for June: 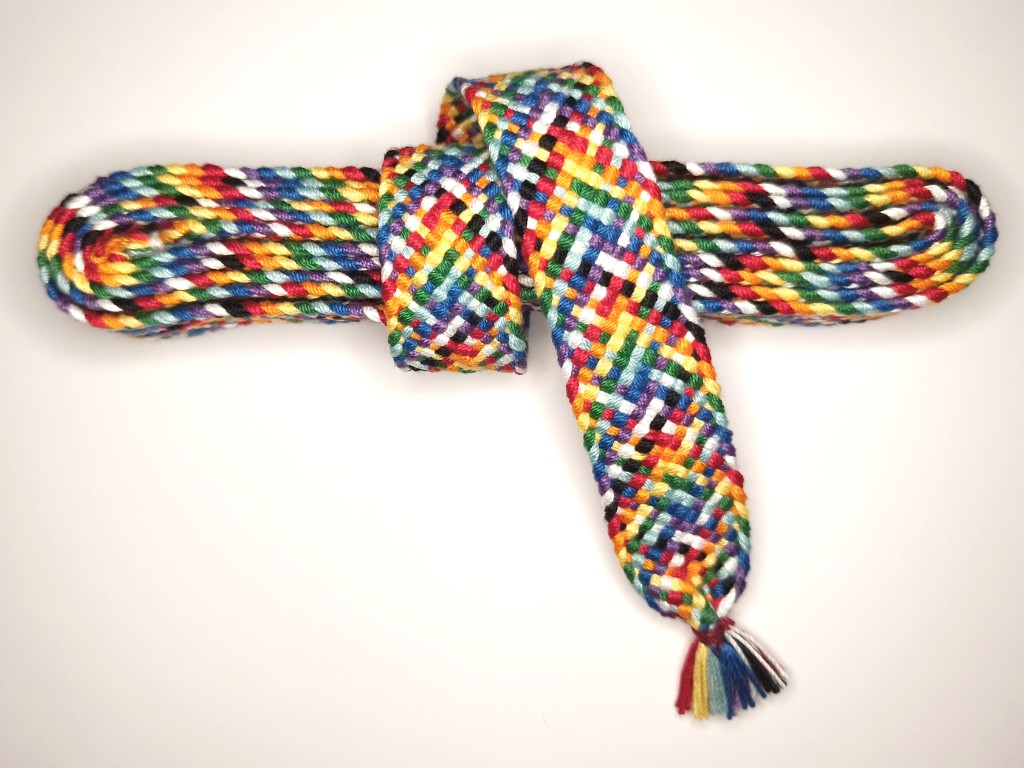
4
5
cross-posted from: https://slrpnk.net/post/31304759
Cardigan in progress
Here's a cardigan I've been working on for a friend. I started it back in April, for her birthday in May. I underestimated how long it would take (though part of this is because I moved in the middle of all of this).
I'm proud of my progress, even though there's a lot to do still. The mesh is just a (1dbl, 1ch) repeated. I started at the back and did a large rectangle. (Using US terminology)
For the front, I started at the shoulders and then worked downwards with the same mesh stitch. I'd do one increase at the inner edge of edge front panel on every other row. So at the very top, if I was starting from the outer edge (what was intended to be the shoulder seam), that was (1dbl, 1ch)*8, then when I started a new row, I did an increase with two doubles in that first stitch. The next row after that had no increases.^[1] I was sort of winging it, but I like how gradually it increased.
I didn't use a pattern because in most of the craft stuff I've ever done, I tend to prefer to make life much harder for myself and understand things from the ground up. That's part of why this has taken so long.
However, it turns out I underestimated how large the back panel should be (this is why patterns tell you to do a gauge swatch I guess). This caused me some difficult in deciding what to do about the fact that there was insufficient space for both the neck and the shoulders. I spent a while looking at if there were ways to extend that main panel, but in the end, I decided to make a long strip for each side that I will seam onto the main body when I'm done. On the bright side, being able to work on the sleeves separately means that it's easier to keep the work a secret from my friend (I live with her, and she thinks that I'm experimenting with some weird mathematical crochet. I don't think she suspects anything, because I was able to redirect by rambling about crochet is super cool for being uniquely able to make mathematical forms like hyperbolae (the best lies always have a granule of truth)
I found the sleeves tricky because I've never crocheted into the side of stitches before, and I spent a while figuring out how to do that in a manner where the stitches for the armhole would be evenly spaced. My original plan was to do this directly into the body, but instead I did it into the addition strip I did to extend the shoulder, but besides that, not much changed. A big tip if you're crocheting into the sides of stitches is to always make sure you go under at least two pieces of yarn, because otherwise the tension caused by the new stitch pulls the existing stitch out of whack a bit. This might be obvious to most people, especially given that in a regular crochet stitch, you go under both of the loops of a stitch, but like I say, doing it freestyle usually involves making things harder for myself in the pursuit of learning.
It didn't help that my stitches seem to be quite tight, so there wasn't much space to get the hook through without splitting the yarn. I ended up "scouting out" where I wanted to put the stitches by poking a smaller crochet hook through to open up the gap better, as well is judicious use of stitch markers for that first row of the sleeve. I was way too persnickety about this, but I'm pleased with how it turned out.
For the sleeves, I ended up switching to treble crochet (US), because I was impatient with how long it was taking. The problem here is that I found that there was too large of a gap at the top of each stitch (i.e. where you insert your hook when making stitches during the next row). I looked all over for tips, and I practiced a bunch to improve my tension, but to little avail. The various tips I found did help, but not nearly as much as I'd like. I suspect it'd be easier if I had more practical experience, but I just couldn't get it consistent, despite practicing on swatches on and off for weeks (I use parcel string from the post office for practicing on). This problem did exist for the double stitches too, but not nearly as badly.
I did find a solution though. I'm almost certainly not the first one to discover this, but I couldn't find anyone talking about this online. What I found worked was to do one less yarn over (yo) than was required for the stitch (which means that for a treble, which usually starts with two yo, I only did one). After pulling up a loop through the stitch, I'd have three loops on my hook, like what you'd have for a double stitch. I'd proceed as normal until I had two loops on my hook, and then I'd drop one of the loops of my hook, holding it with my fingers so I could pick it up again afterwards. Then I would insert my hook beneath the bar that was better the developing post of my new stitch, and the preceding stitch, before picking up that dropped loop again (resulting in three loops on the hook). Then I'd just finish the stitch as normal ((yo, pull through two loops)*2). It worked surprisingly well. If people are interested, I could do a larger write up of this technique. If anyone knows of someone who has also figured this out, or if it has a name, let me know — I'd love to learn more)
There's still lots to do, especially as I'm planning on doing bell sleeves. That was another part of the delay. I did look for advice online for this, but I was unsatisfied with what I found, and opted to spend a while trying to understand the geometry of increases. If people are interested in this, I can share my calculations when I get to that point (I did a bunch of maths and trials, and I put the note away safe until I get to that point, nearer the elbow (which is pretty soon actually, now that I've cracked the treble problem).
Tools and materials used: I used a 4.0mm hook, mostly because it's my favourite one I own. It's the addi swing hook and it's a sort of ergonomic shape that works well with how I like to hold my hooks (though it's awkward for people who like to hold their hook differently, such as my friend, who has also been learning crochet).
The yarn is King Cole Linendale in Damson. I went for it because it's a cotton, viscose and linen blend (57%, 30% and 13% respectively) and I wanted to make something that'd be cooler for Summery months (bear in mind this was intended as a gift for a May birthday). The yarn is quite splitty, but not overly so. I did have to be careful with it though, and occasionally I have to reintroduce twist into the yarn because right handed crochet stitches introduce twist opposite to the twist of the yarn, which causes it to untwist. I would do this by periodically holding the work up in the air, tying a half hitch knot around the ball of yarn so I can dangle it below the work without it all unwinding, and then spinning the yarn round to reintroduce twist into the yarn. I'd then smooth my fingers over the yarn a bit to try to even out the twist a bit so it doesn't gather all in one area. I wouldn't advise you do this though, because it seems like it's a lot of faff, hard to do consistently, and may lead to areas of excess or insufficient twist in areas of the yarn. A drapey garment like this seems like it will especially require blocking, but this twist problem means that is even more so the case. Blocking should help alleviate it though.
In an ideal world, I'd have been able to find some yarn with the kind of fibre blend I wanted but was also Z-twisted (as opposed so S twist, as this is). I've done a lot of work understanding yarn twist, so I could also make a post about this if y'all want. I did some silly experiments that involved learning way more about knot theory than was reasonable, so I think I have stuff to add beyond what you tend to read about yarn twist online (not necessarily useful stuff, but I find it interesting). I'm also planning on practicing left handed crochet so that I can use S twisted yarns for crochet more easily.
A cute touch that I have yet to do that y'all will probably appreciate it that I was planning on crocheting a small Swatch and sewing it into the cardigan loosely, like one would a label. This is so that my friend has spare yarn should there be any damage to it. That seems likely, given that the mesh may be prone to getting snagged. My friend is a crocheter, so I want to facilitate her being able to make repairs if necessary. I like this idea because it feels like it encapsulates so much of what I enjoy about crafting items; even if I were more proficient and didn't spend so much time overcomplicating things for myself, a garment like this would still take hours and hours to complete. I like that though. Handicrafts feel like a project of macro-scale mindfulness, and thus this is a little artifact of my resistance against the slop economy we're all living under. I would argue that engaging in crafts in this way is a powerful form of political praxis (though we need to be mindful to not slip into counter-productive consumerism, as I see craft communities and content often do)
Anyway, let me know what you guys think, either of the work in progress itself, or things I've mentioned in this post. Do let me know if you'd be interested in me going into more detail on anything in separate posts. What I've made, nor what I've learned is all that impressive, but I liked writing this post. I don't even know if I'm subscribed to this community yet, but when I realised that this was a space I could share my progress, I thought it'd be cool to contribute to the community. I'm subscribed to a few different craft communities on Lemmy, which are delightful, but often done have much posted to them at the moment. Even if what I have written here isn't super interesting or well written, it's nice to feel like I'm contributing to something. I wrote this post with myself as the intended audience, because I love reading about people's process and learning journey, even if it's in a hobby I don't do, or if it's stuff I already know. The modern internet is often grim, but I love how it enables me to connect with people who are weird in the same ways that I am.

6
Working on the strap for that bag from a few posts ago, and it's... quite a bit more ponderous than the main part was, lol. I gotta say though, Tunisian flat stitch is as awesome as CrochetKim says it is.
#tunisiancrochet #crochet #wip @bistitchual@piefed.social

7
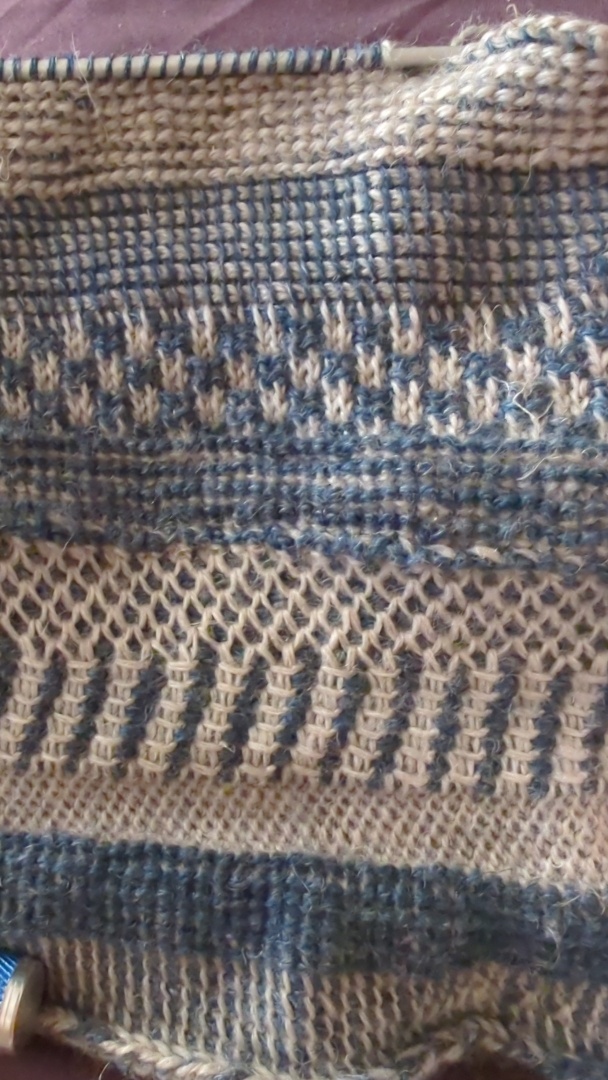
One if my boyfriends wanted one. This time we're going with:
- Basketweave v2 stitch
- new one I'm calling Cordyceps stitch
- Smock stitch
- bamboo stitch
- What CrochetKim calls "Tunisian Simple Stitch To Back Loop" but I call eyeball stitch
- Reverse stitch
- Simple stitch
8
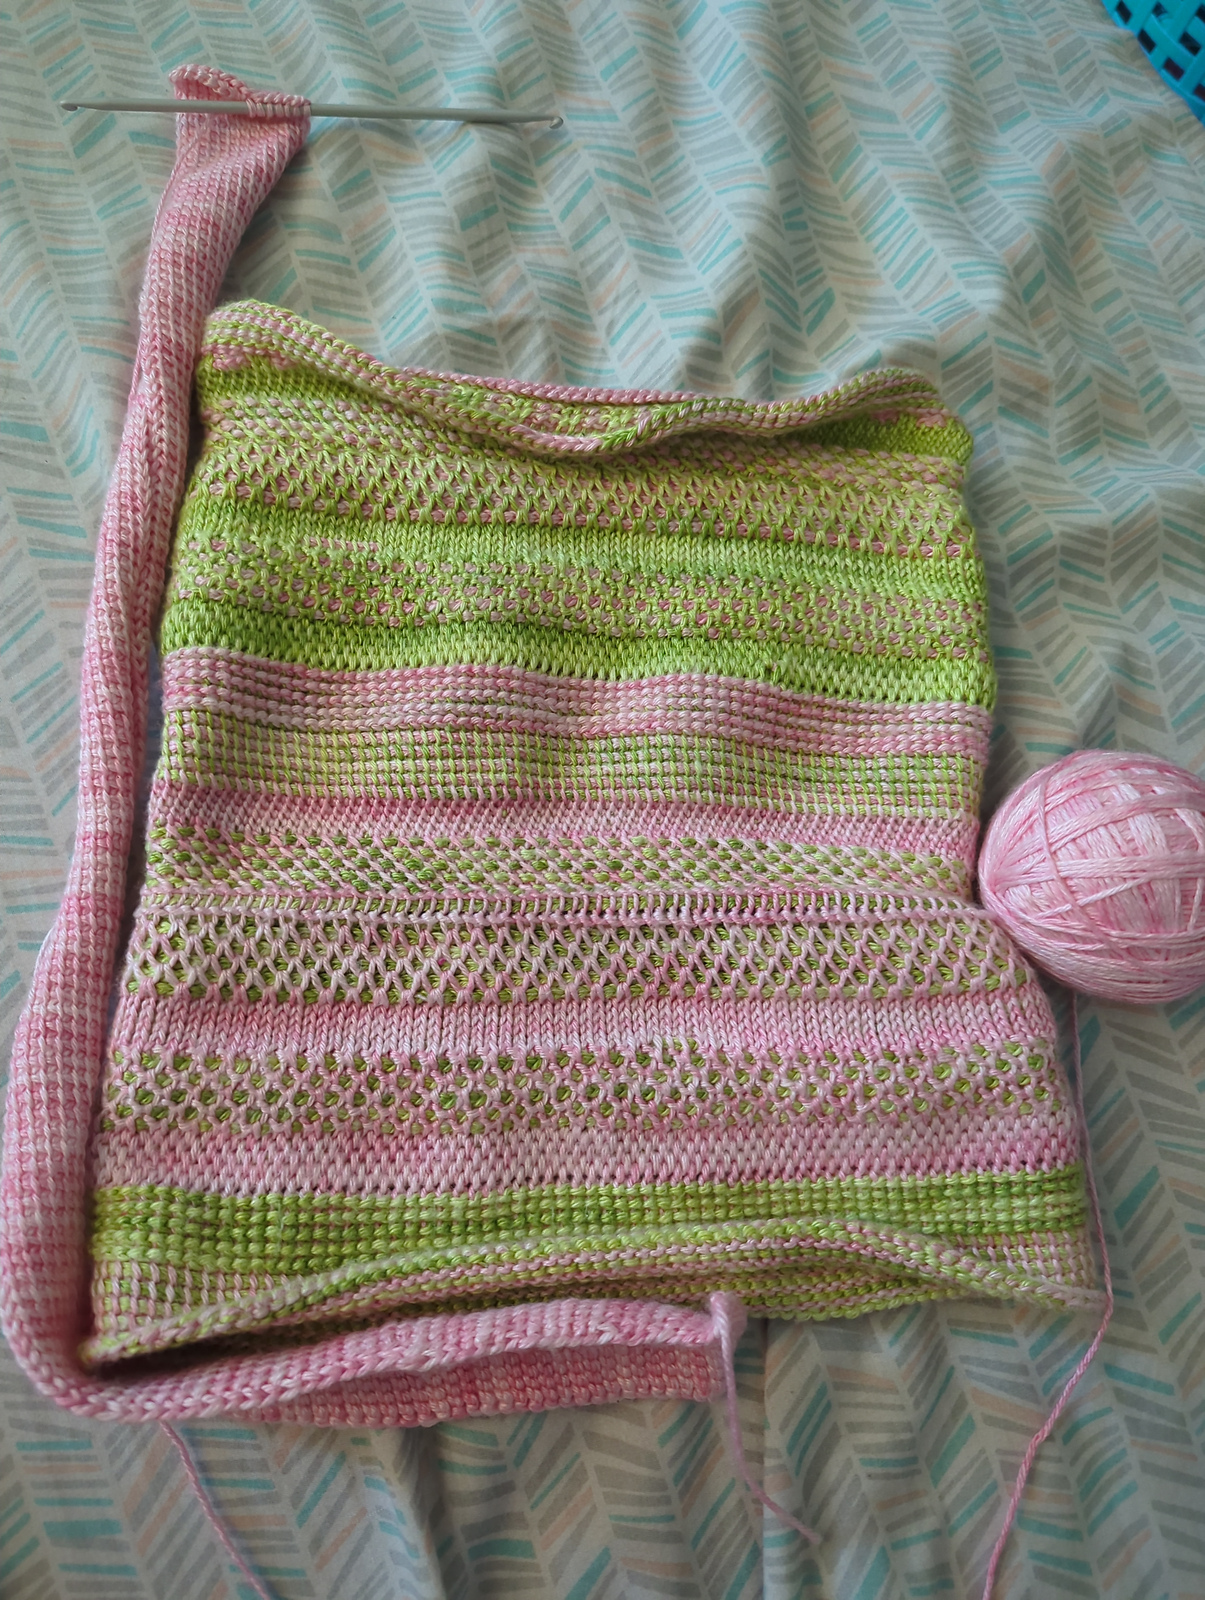
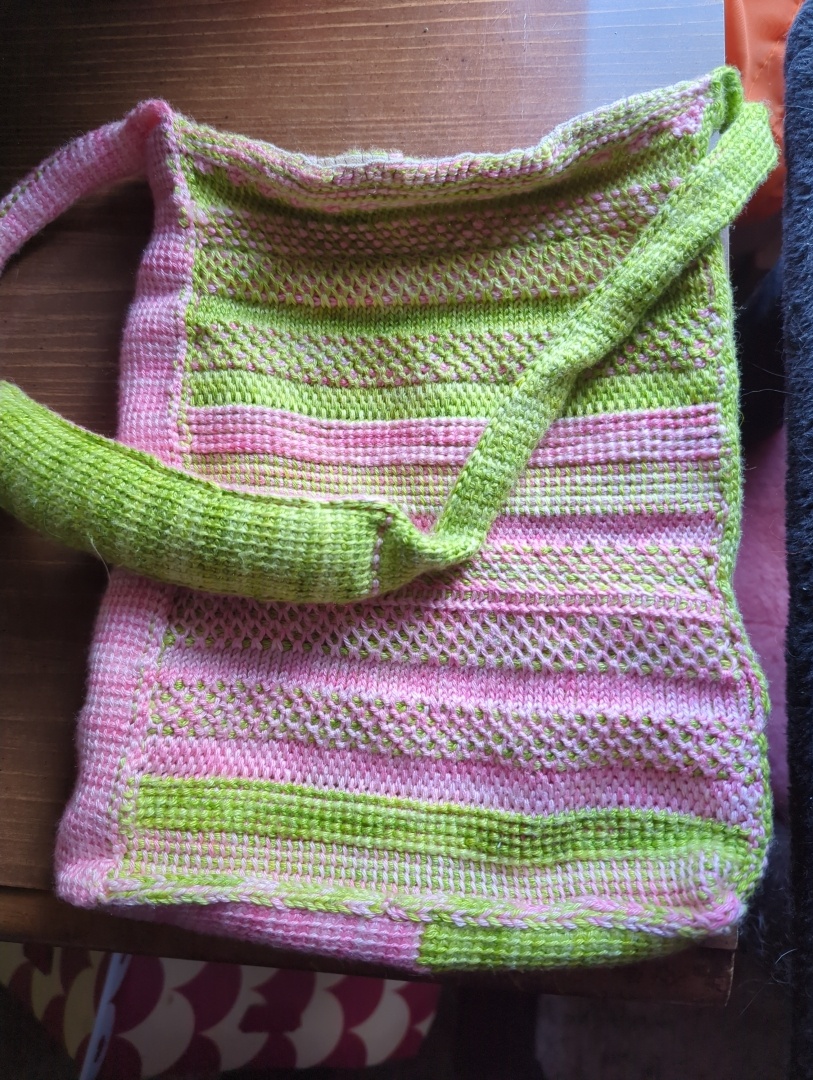
Finally finished, this took so long lol. Please forgive my amateur work! Not sure this thing is good enough for anybody else to want to make one, but just in case, it basically goes like this:
- Make a wide tube with Tunisian in-the-round technique, using a double sided hook and two different yarns.
- Switch to a new type of stitch every 5 rows or so, try to alternate between curling and non-curling types.
- Once your bag is approximately half the intended height (or you run out of stitches) then exchange your forward pass yarn with your backwards pass yarn and repeat the entire first half. This gives you all the same patterns again, but switches the foreground/background colors.
- Once the tube is done, bind off in pattern.
- Make a thin flat band, switching colors halfway through. Long enough to wrap all the way around the tube height-wise, with enough extra to make a good strap, and then enough extra again to match shoulder-width.
- Sew the middle section of this band to one open end of the tube, such that it is closed off, and then up either side.
- Take both free ends of the band, overlap them shoulder-width, then sew the overlap area together.
- Run a bunch of double-forearm length pieces of thread through hard beeswax, then iron them so it absorbs.
- Cut fabric so that, when held in tube shape, it matches the bag size and then some.
- Backstitch a felled seam to make the tube shape permanent.
- At one open end of the tube, fold a bit of both sides inward, paper sandwhich bag style.
- Backstitch a felled seam across this open end, closing it off and keeping the folded-in sides in place.
- Fold over the rim of the open end twice and backstitch it.
- Put the fabric bag inside the crochet bag such that the corners align.
- Use a strong but removable stitch to sew the rim of the inner bag to the outer bag.
For this particular one in the pic, the strap is made in flat stitch, and all the stitches used on the body are:
- Wrapped reverse stitch
- 2×2 rib of knit and wrapped reverse stitches.
- Simple stitch to back loop
- Offset cross stitch
- Smock stitch
- Knit stitch
- Honeycomb stitch
- Full stitch
- Reverse stitch
- Simple stitch
...and for materials I used:
- Fingering weight Lumen wool/silk yarn made by the Lancaster Yarn Shop, in peridot and shell pink
- 3.5mm Addi Tunisian double hook
- Size 10 Tulip bent tip tapestry needle
- Size 26 John James gold-plated tapestry needle
- 50wt Aurifil cotton Mako thread #BMK50-5013
- 5 OSY Tuscarora Mills cotton/linen dimity weave fabric #107-N
- Local beeswax
- Iron, ironing board
- "Pineapple Grove" scented Soak all-natural detergent
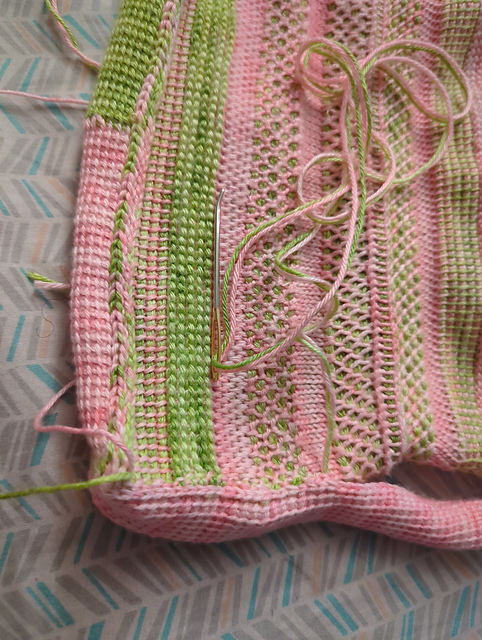
More pics:
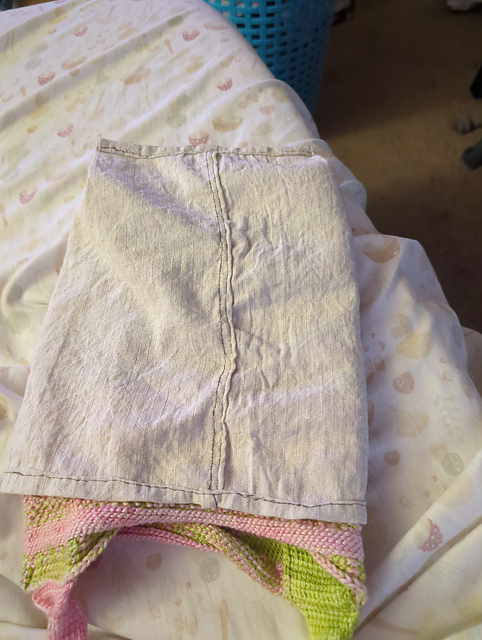
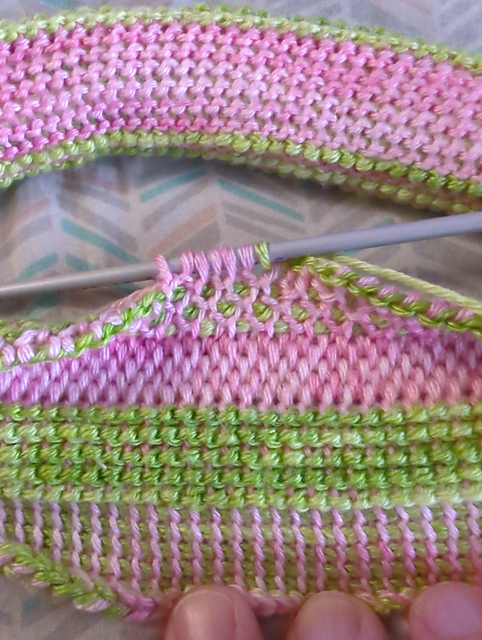
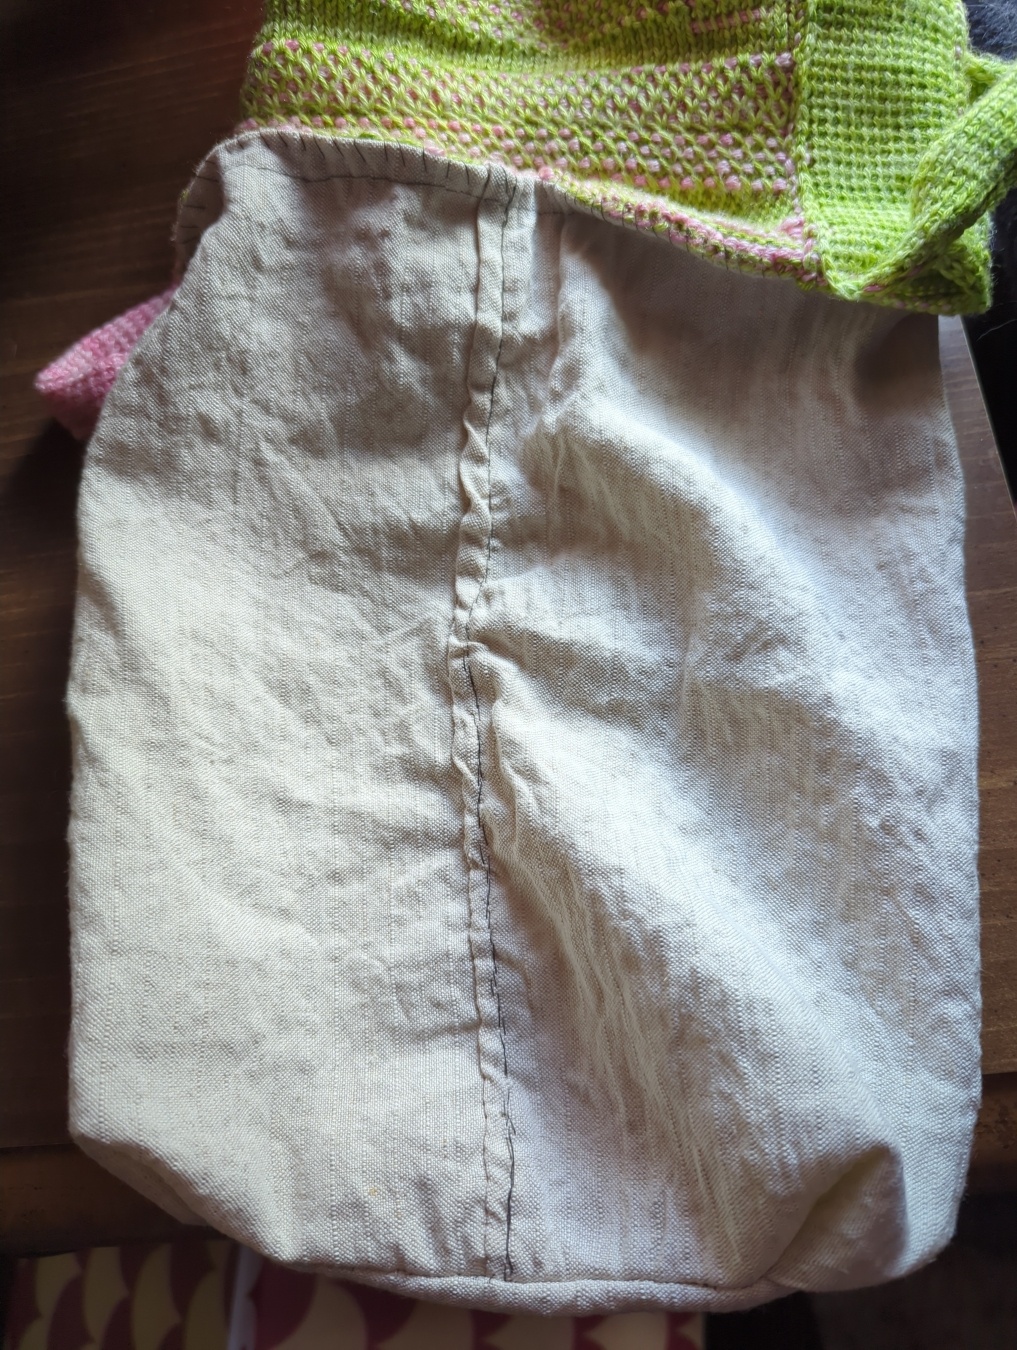
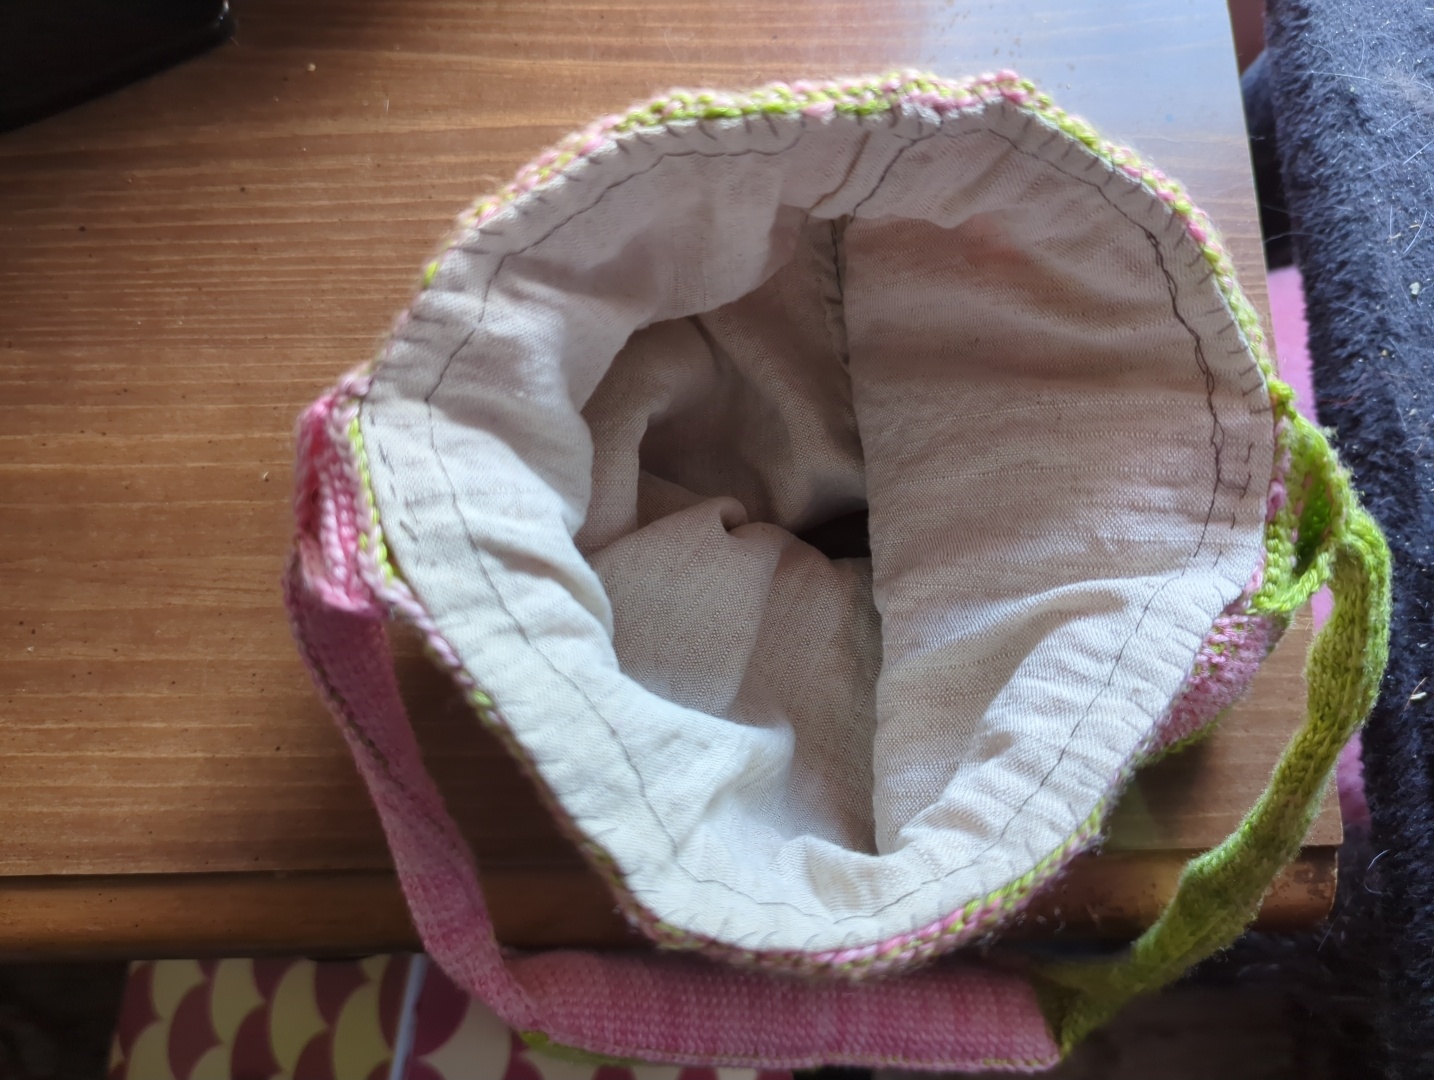
9
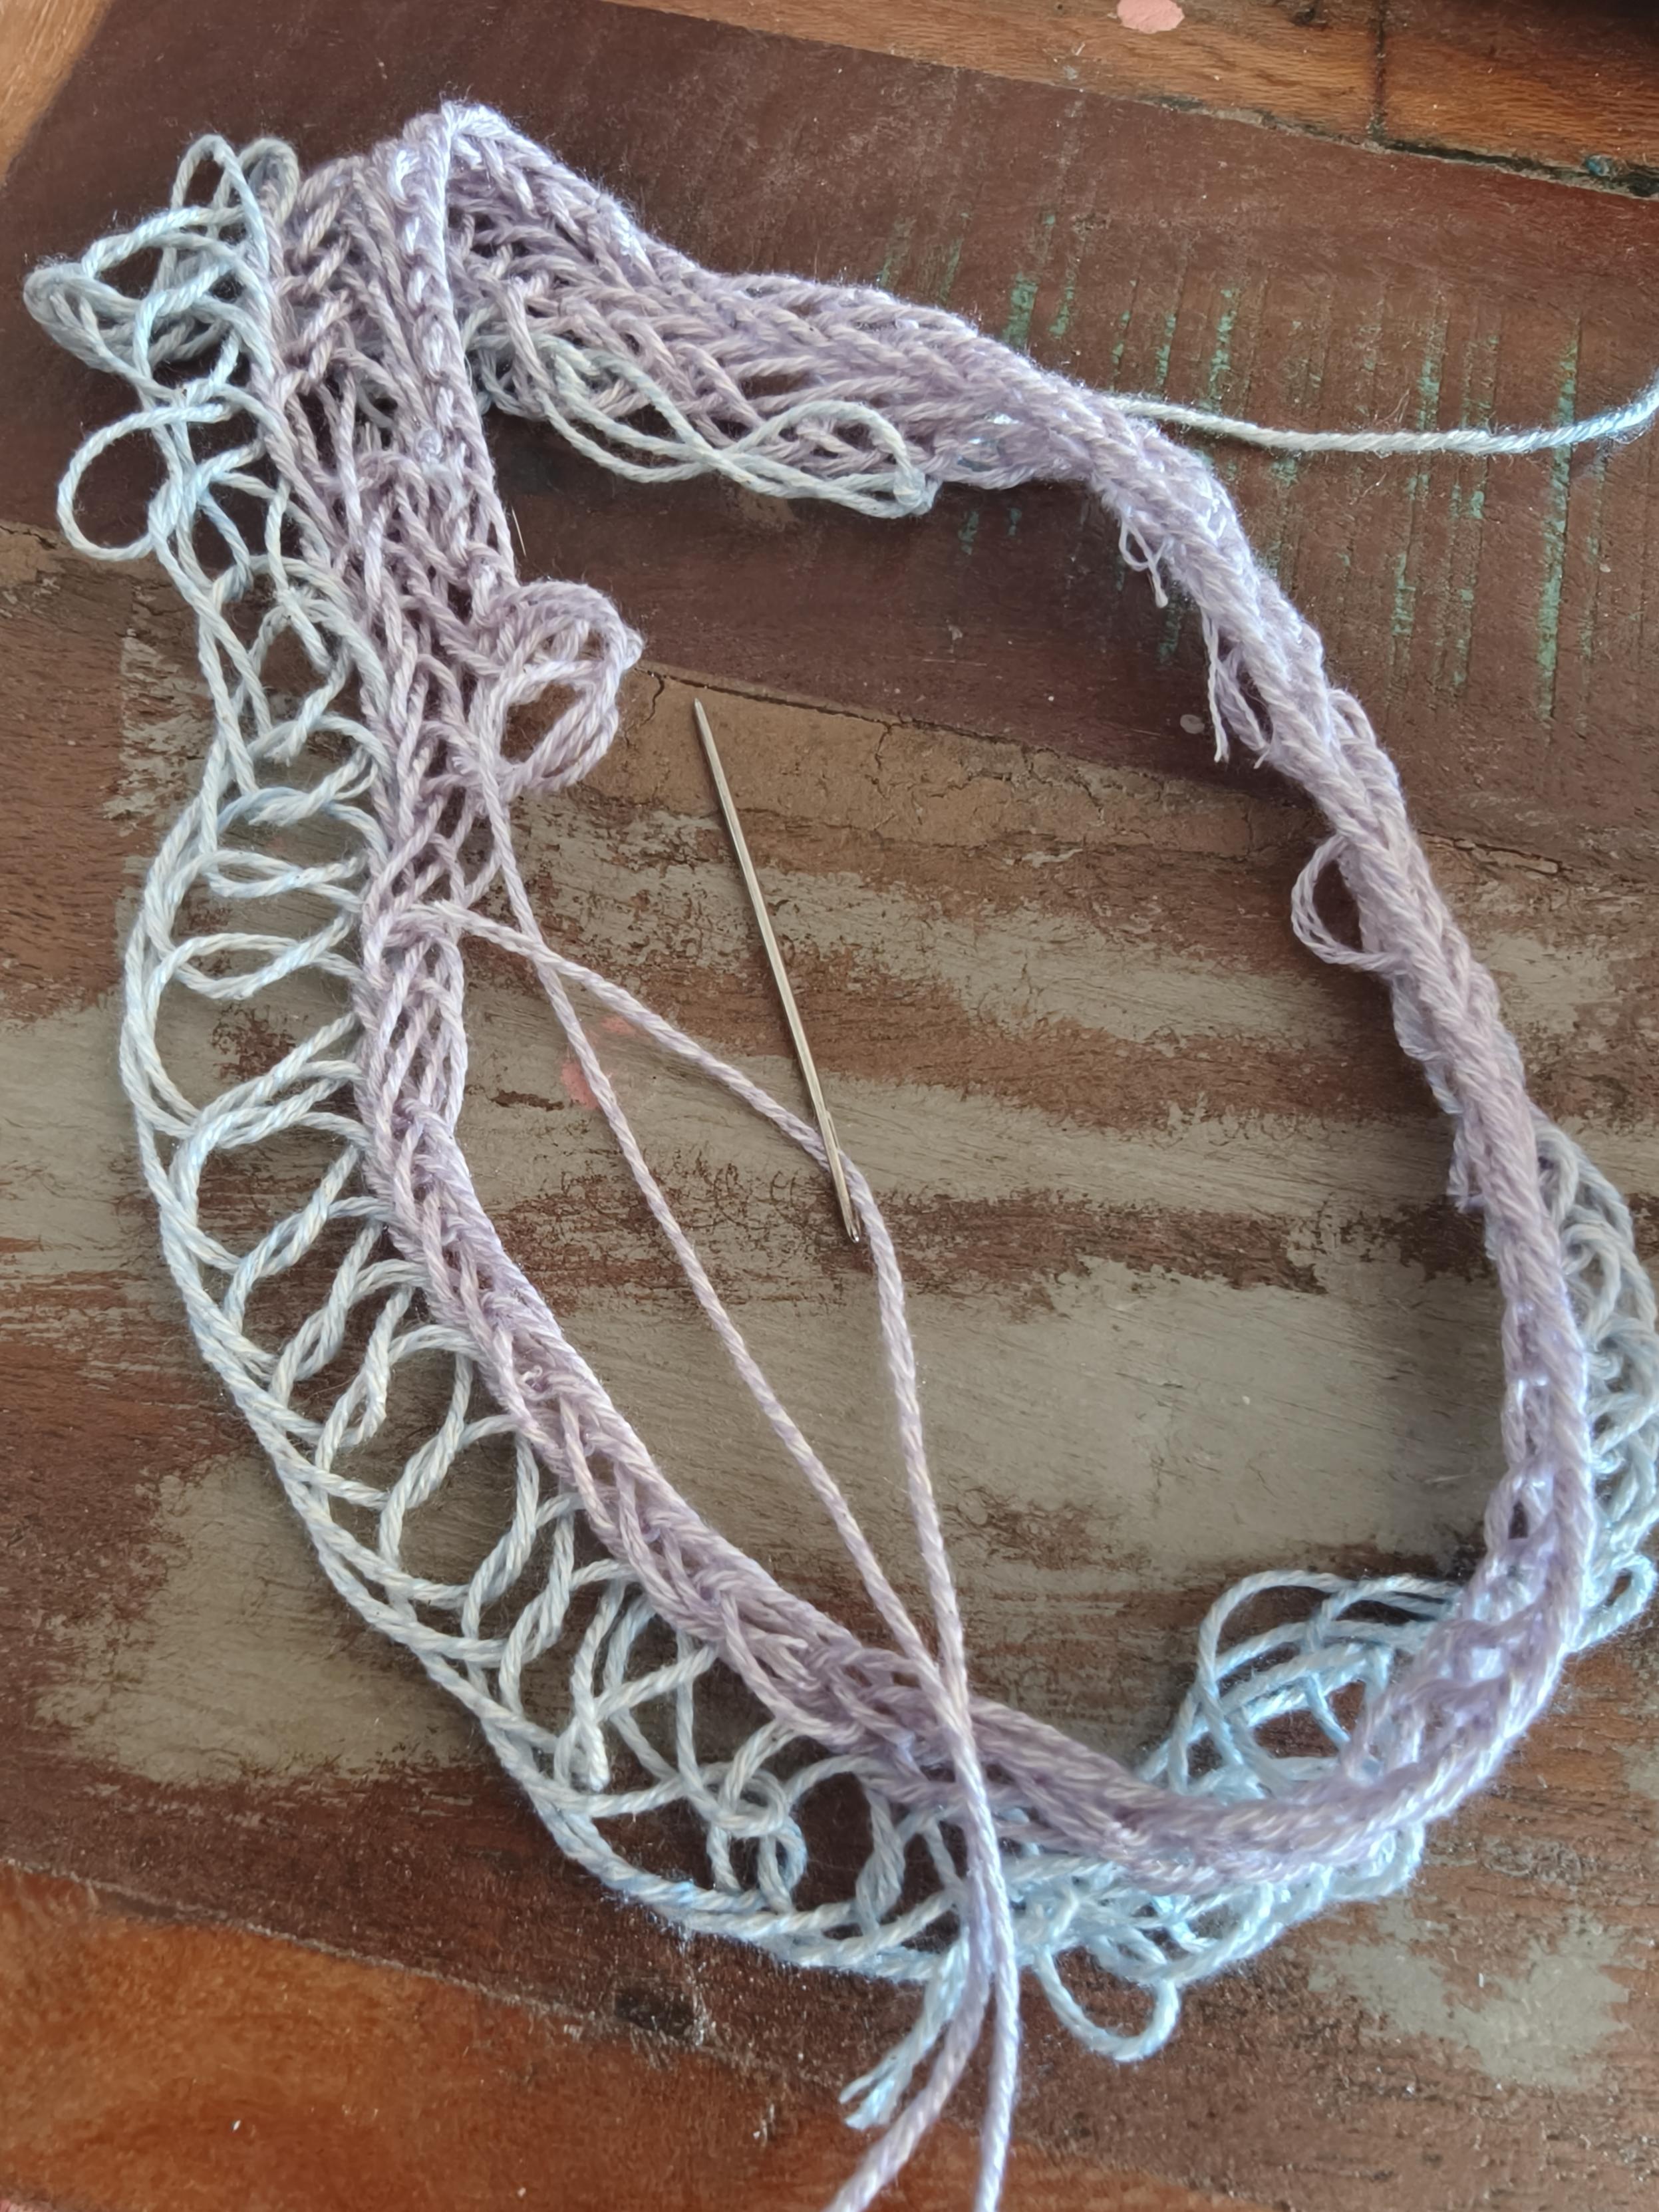
Mhhhhm... Something seems wrong with my nålebind project.. 🤔 Must be the colours, i'm sure ! Not at all because I didn't tie the knots tight enough on the first row 😌 Fortunately, the project is to make a headband, so it's not too much of a problem (if it had been socks or something else, a bit more complicated...)@bistitchual @fiberarts @fibrearts#Nalbind #fiberarts (#nalebind ??) #SomethingSeemsWrong
10
11
12
13
The Nashoba Valley Weavers' Guild is hosting a really cool event combining two topics: deflected doubleweave and zero waste textiles! Deflected doubleweave is a technique where you get all these cool organic shapes that only really become apparent once it's off the loom:
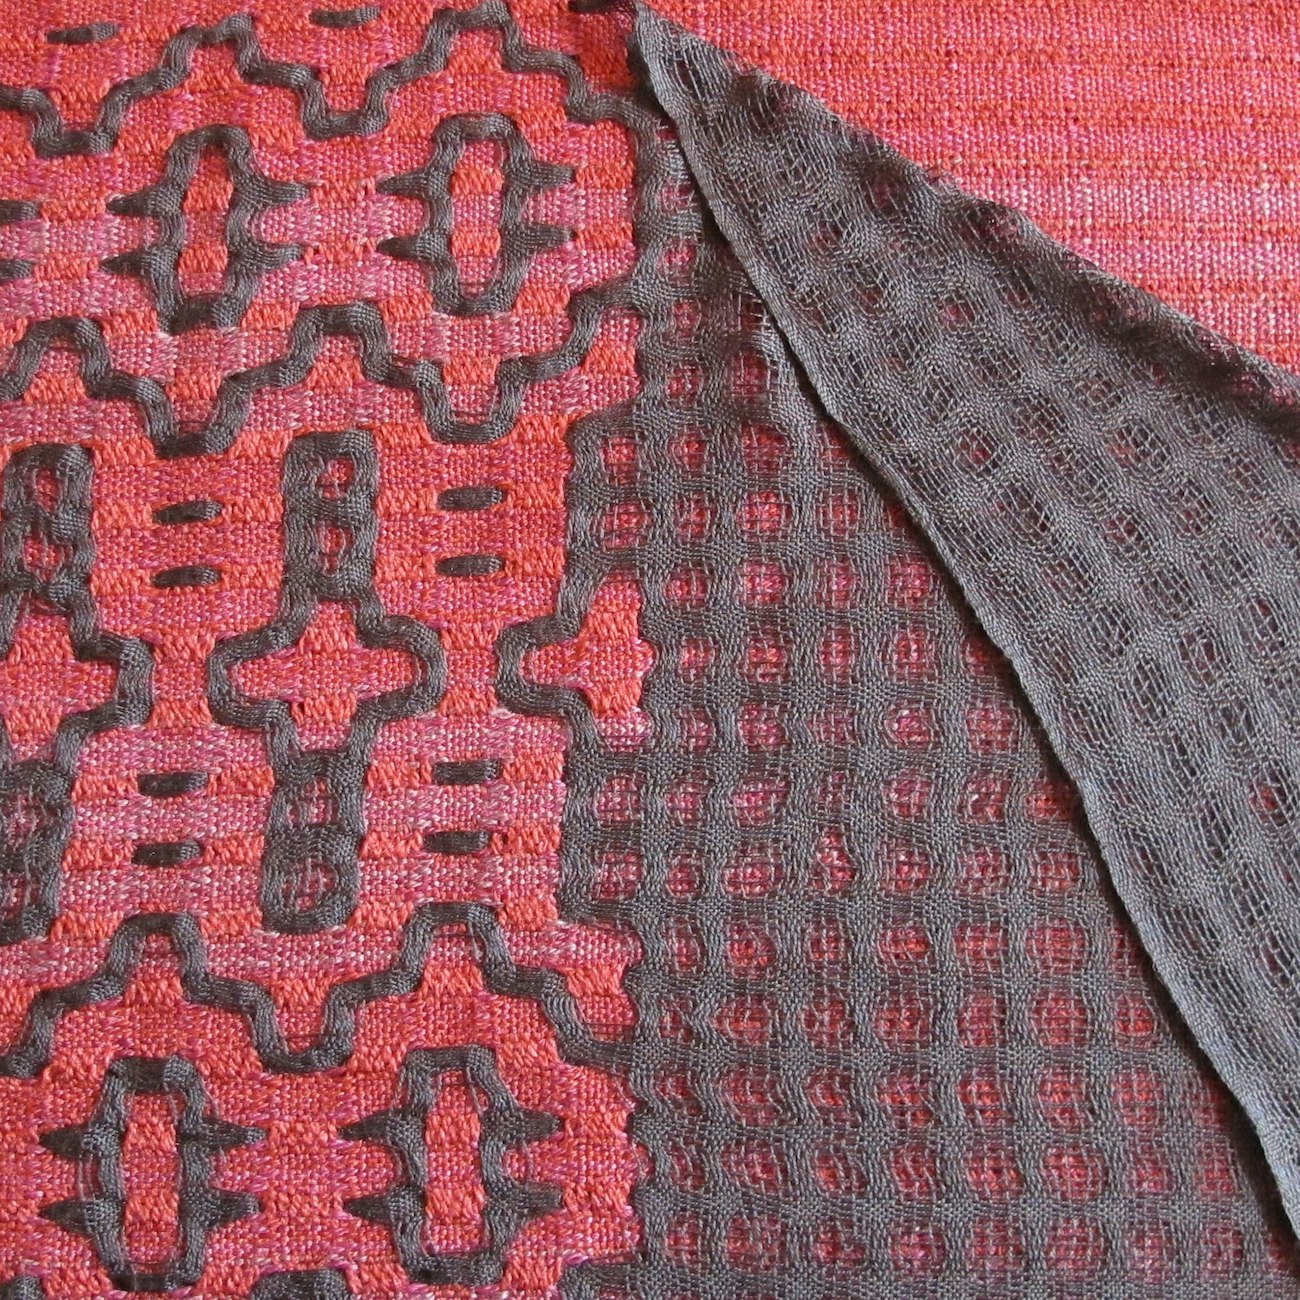
I'm not sure what the zero waste part will entail but I'm excited to find out.
14
I don't know how common this might be, but I do my nalbinding (nålbinding/naalbinding/etc) quite a bit differently than any instructions show. I keep my working loops on a long long knitting needle, and hold that the way an English cottage knitter does. I use a small tapestry needle for my naal, and I mostly work with thinner cotton yarns. Since you can't wet splice those, I Russian join the segments together. The whole thumb-hold thing never really worked well for me; even when it went right, my fabric would be all loose. That's probably just a skill issue that I could overcome with time, but my way works now, so I stick to it lol. Also, it helps me keep track of which loop is which. If I'm doing it correctly, this ought to be Mammen stitch. I hope.
That said, the traditional way clearly works very well for most people! Look at this person's beautiful stitches.

15
Check in on your local guilds/societies etc! They do cool stuff, here's an example near me.
(www.lostartlacers.org)
16
A weird thing about Tunisian crochet is that the flat and in-the-round variants are quite different from each other! Flat uses a singed ended hook, and round uses a double ended hook. Flat builds up stitches on the hook in one direction, and removes them from the hook in the opposite direction. Round builds up stitches in one direction, and removes them in the same direction, but off the other side of the hook. There are patterns you can produce in round that seem impossible to do in the other, and vice versa. Here, I'm trying to guess at one possible flat method to mimic this traditional in-the-round pattern.
So, intuitively it seems doable the standard way, at first. The beginning goes easy enough. You work forward in yarn color A, then tie in yarn color B and do your return pass in that. Now, you go to do the next forward pass, but gasp! The working end of yarn color A is still over on the other side of the work! You left it there when you tied on yarn color B.
One attempt I've seen done is to carry the unused yarn along the back of the work, but it's messy and makes for a loose fabric. I went another method:

How this goes is, you use the double ended hook you'd usually use for in-the-round. You pick up and remove stitches with the two ends as you would in the round, until you get to the other side. This is where it gets weird. Now, you do that exact same thing over again, except you do everything in reverse! The side of the hook you were using to remove stitches, now you're using it to pick them up. And the side you were using to pick up stitches will remove them. It doesn't feel great or intuitive, it's basically like switching from left handed to right handed or vice versa.
It works, but as you can see there's one more problem. The vertical ribs in TSS always tilt slightly to one side, but now the tilt direction changes each row! There is a way to fix that using twisted TSS stitches on alternate rows, but to make it more complicated, I also wanted to have a solid color border at the left and right. This is roughly how I thought it could go, combining this new method with the float method mentioned earlier for the sides:

So, incorporating all this, I tried it again. Here's the comparison, with LOTS of mistakes. It was eally hard to get the hang of lol. Check it out:


17
Usually tablet weaving is done with square tablets that have 4 holes, but 6 hole tablet weaving is known from various times and places throughout history. It opens up tons of possibilities for new color patterns and strength. The late great Peter Collingwood's book The Techniques of Tablet Weaving goes into some detail about it, but the patterns are quite daunting! As you can see in the pic, though these are 6 hole tablets, I'm only using 4 of them for now. Working my way up lol. Not even a particularly fancy pattern on this practice piece:

I couldn't find any hexagonal tablets for sale that matched what I wanted, so I 3d printed these ones. The design has changed since:

The pips around the outer holes helps you keep track of which thread you're on. The idea with the center hole is that you can put a star shaped rod through it that holds everything still as needed. I thought I'd be able to use the rod to make turning easier, isolate out individual tablets easier, etc. However, (obvious in retrospect) the threads just get wrapped around it and make it hard to remove after turning. Whoops!

I've since been told that you can use a central hole to give each plied warp of the finished work a core thread/wire for super strong fabric! So that's pretty cool.
Has anyone else experimented with non-square tablets?

18
First, for anybody unfamiliar with it, the basic idea is to create knitted fabric with a crochet hook, thus knit-hooking, or knooking. Anybody familiar with both knitting and crochet will know one of the major differences is that knitting keeps a whole bunch of live stitches open the whole time, while crochet keeps just one. Where crochet stitches are dependent on just the stitches at their sides, knit stitches are also dependent on the stitches above and below them. To achieve knitting via crochet, the basic steps are:
- Use what looks like a basic crochet hook, except at the back end there's a eye-hole, like in a sewing needle.
- Attach a length of yarn/cable/thread/etc to the eye-hole.
- Do all your picking up and transferring of stitches with one hook instead of two needles.
- Keep all the live stitches on the length of yarn at the back, which can be reached by the hook since it's flexible.
It's a relatively new invention, and still very niche, as one can tell from the fact that it doesn't even have it's own Wikipedia page. It only gets a brief mention on the wiki pages for crochet hooks and for knitting in general.
Now, the topic for discussion in this post is whether knooking is capable of, and suitable for, making it's very own structures. Is there a way, using what can generally be thought of as "knooking", to make a fabric that is not identical to either knitting or crochet? I've asked this question in the past, and one person took it upon themself to investigate further. They suggested:
...a knitting type stitch (by that I mean it should not close the stitch as in regular crochet but leave a loop on the hook/cord) but with some loop through loop drawing that requires the hooked end to make. What I'm thinking is something like a knit stitch through which you draw a loop (or more than one) like you were making a crochet chain.

Internet sleuthing hasn't turned up many results on this topic, it seems like not many people have really looked into it. If anyone has any thoughts, or has given it a try, or would like to give it a try, let us know!
19
I made this mostly as a way to practice as many Tunisian in-the-round stitches as possible. It is a pretty comfy purse though! The yarn is interesting, I found these enormous spools of it at Goodwill. It's very fine, maybe lace weight, except it's slightly fuzzy? It's not very strong but once it's worked up into a reasonably dense fabric, it'll hold up. Gives the finished object a soft and fuzzy feel.
There's no pattern, but it's very simple. Just work the body of the purse in-the-round as one big cylinder, switching types of Tunisian every few rows for coolness. Then separately make a thin, lonnnggg band of flat Tunisian simple stitch. Slip-stitch the band to the bottom of the cylinder to close it off at one end, and then continue stitching it up the sides of the cylinder. The excess band at the top becomes the purse strap. Overlap and stitch together the ends of the band to form a nice thick padding for your shoulder.
Tunisian in-the-round hooks are little harder to find than hooks for working flat. I really love the set I used to make this purse, but the company discontinued it! I've lost a few of them since then too...


20
This is a very versatile technique in which you use a special tool (a gripfid) to split the plies of a yarn, and then feed other yarns back through. You can do some pretty amazing colorwork and stitch patterns with it. Everything I've made so far has this very pleasant and unusual "squishiness" to it. Most commonly it's done with 4-ply yarns, splitting them in half each time, but there are tons of other variations. Linda Hendrickson's books on the topic have been a huge help! Something I do that I don't think I've seen mentioned elsewhere is dipping the free ends of the yarn segments into hot wax. This keeps them from fraying as you work, makes them easier to insert into the gripfid, and makes them less likely to come loose.

21
A bag made with interlaced sprang weaving, and a braided drawstring. Sprang weaving is amazing!! My brother abused the heck out of this thing for years and it held up really well. It's perfect for bags (and pants), because it's super stretchy width-wise and completely inflexible height-wise. I learned most of what I know from one of Carol James' books , but there's so much I haven't tried yet. Basically, the concept is that it's like weaving, but with only warp threads and no weft. You start with a warped loom, but then you twist the warp threads across each other. Each row you (usually) twist the threads across each other in a different way. Like maybe on row one you twist each thread with it's neighbor, and then on row 2 you skip a thread and do it again so the pairs are different, then on row 3 do the original pairs again except twist them the opposite direction, etc. In yet another example of modern historians wildly misunderstanding/undervaluing the "women's work" of ancient textiles, check out this amazing article on the history of tight-fitting colorful clothes! Spoiler, it was probably sprang.

22
Hi stitchers! I have a question for you, but I'll provide some examples/context first. So, depending on your crafts of choice, hopefully you'll be familiar with some of these.
First, the structure we most commonly know from (usually accidental) twisted knitting stitches. This same structure can be created through a technique called cross-knit looping, from the larger field of looping in general. And once more, it can also be created through the method of knooking. While the work is in progress, none of these techniques look anything alike, but the resulting structure is exactly the same, as seen here:

Second, the structure we most commonly know from the simplest form of tablet weaving. Each card/tablet holding 4 threads is spun, and in that process those 4 threads are plied into 1 thicker yarn. But at the same time, a weft thread is being fed between these plies, and locking each card's yarn to the next:
 Well, this exact same structure can be created in reverse through a form (darning) of ply-spit braiding! Yarns that are already plied have their plies separated by a special tool, and a weft thread is fed through, connecting one to the next:

So finally my question to you: What other examples of this phenomenon have you observed? Textile structures that are generally identical, but created in wildly different ways. I really enjoy these and I'd love to hear about ones you've encountered in your crafting adventures!